
How to Make an Autumn Wreath

An Autumn wreath is a great way to ease yourself into the season and celebrate the beautiful colours, shapes and textures around at this time of year. It’s also a nice warm up to having a Christmas wreath nearer November and December time.
In this post this week, I’ll teach you how to make an Autumn door wreath of your very own. Starting with what you’ll need, how to arrange the base and also ideas for decoration. Once you finish making your door wreath you can choose to display it indoors on your wall along with your other interiors or you can show off its splendour to your neighbours by hanging it from your front door.
You will need:
Strong Scissors
Copper wreath ring, depending on the size you’d like to make you can choose the dimensions
Reel wire which you use to secure some of the stems that are broken or flimsy
Plant material.
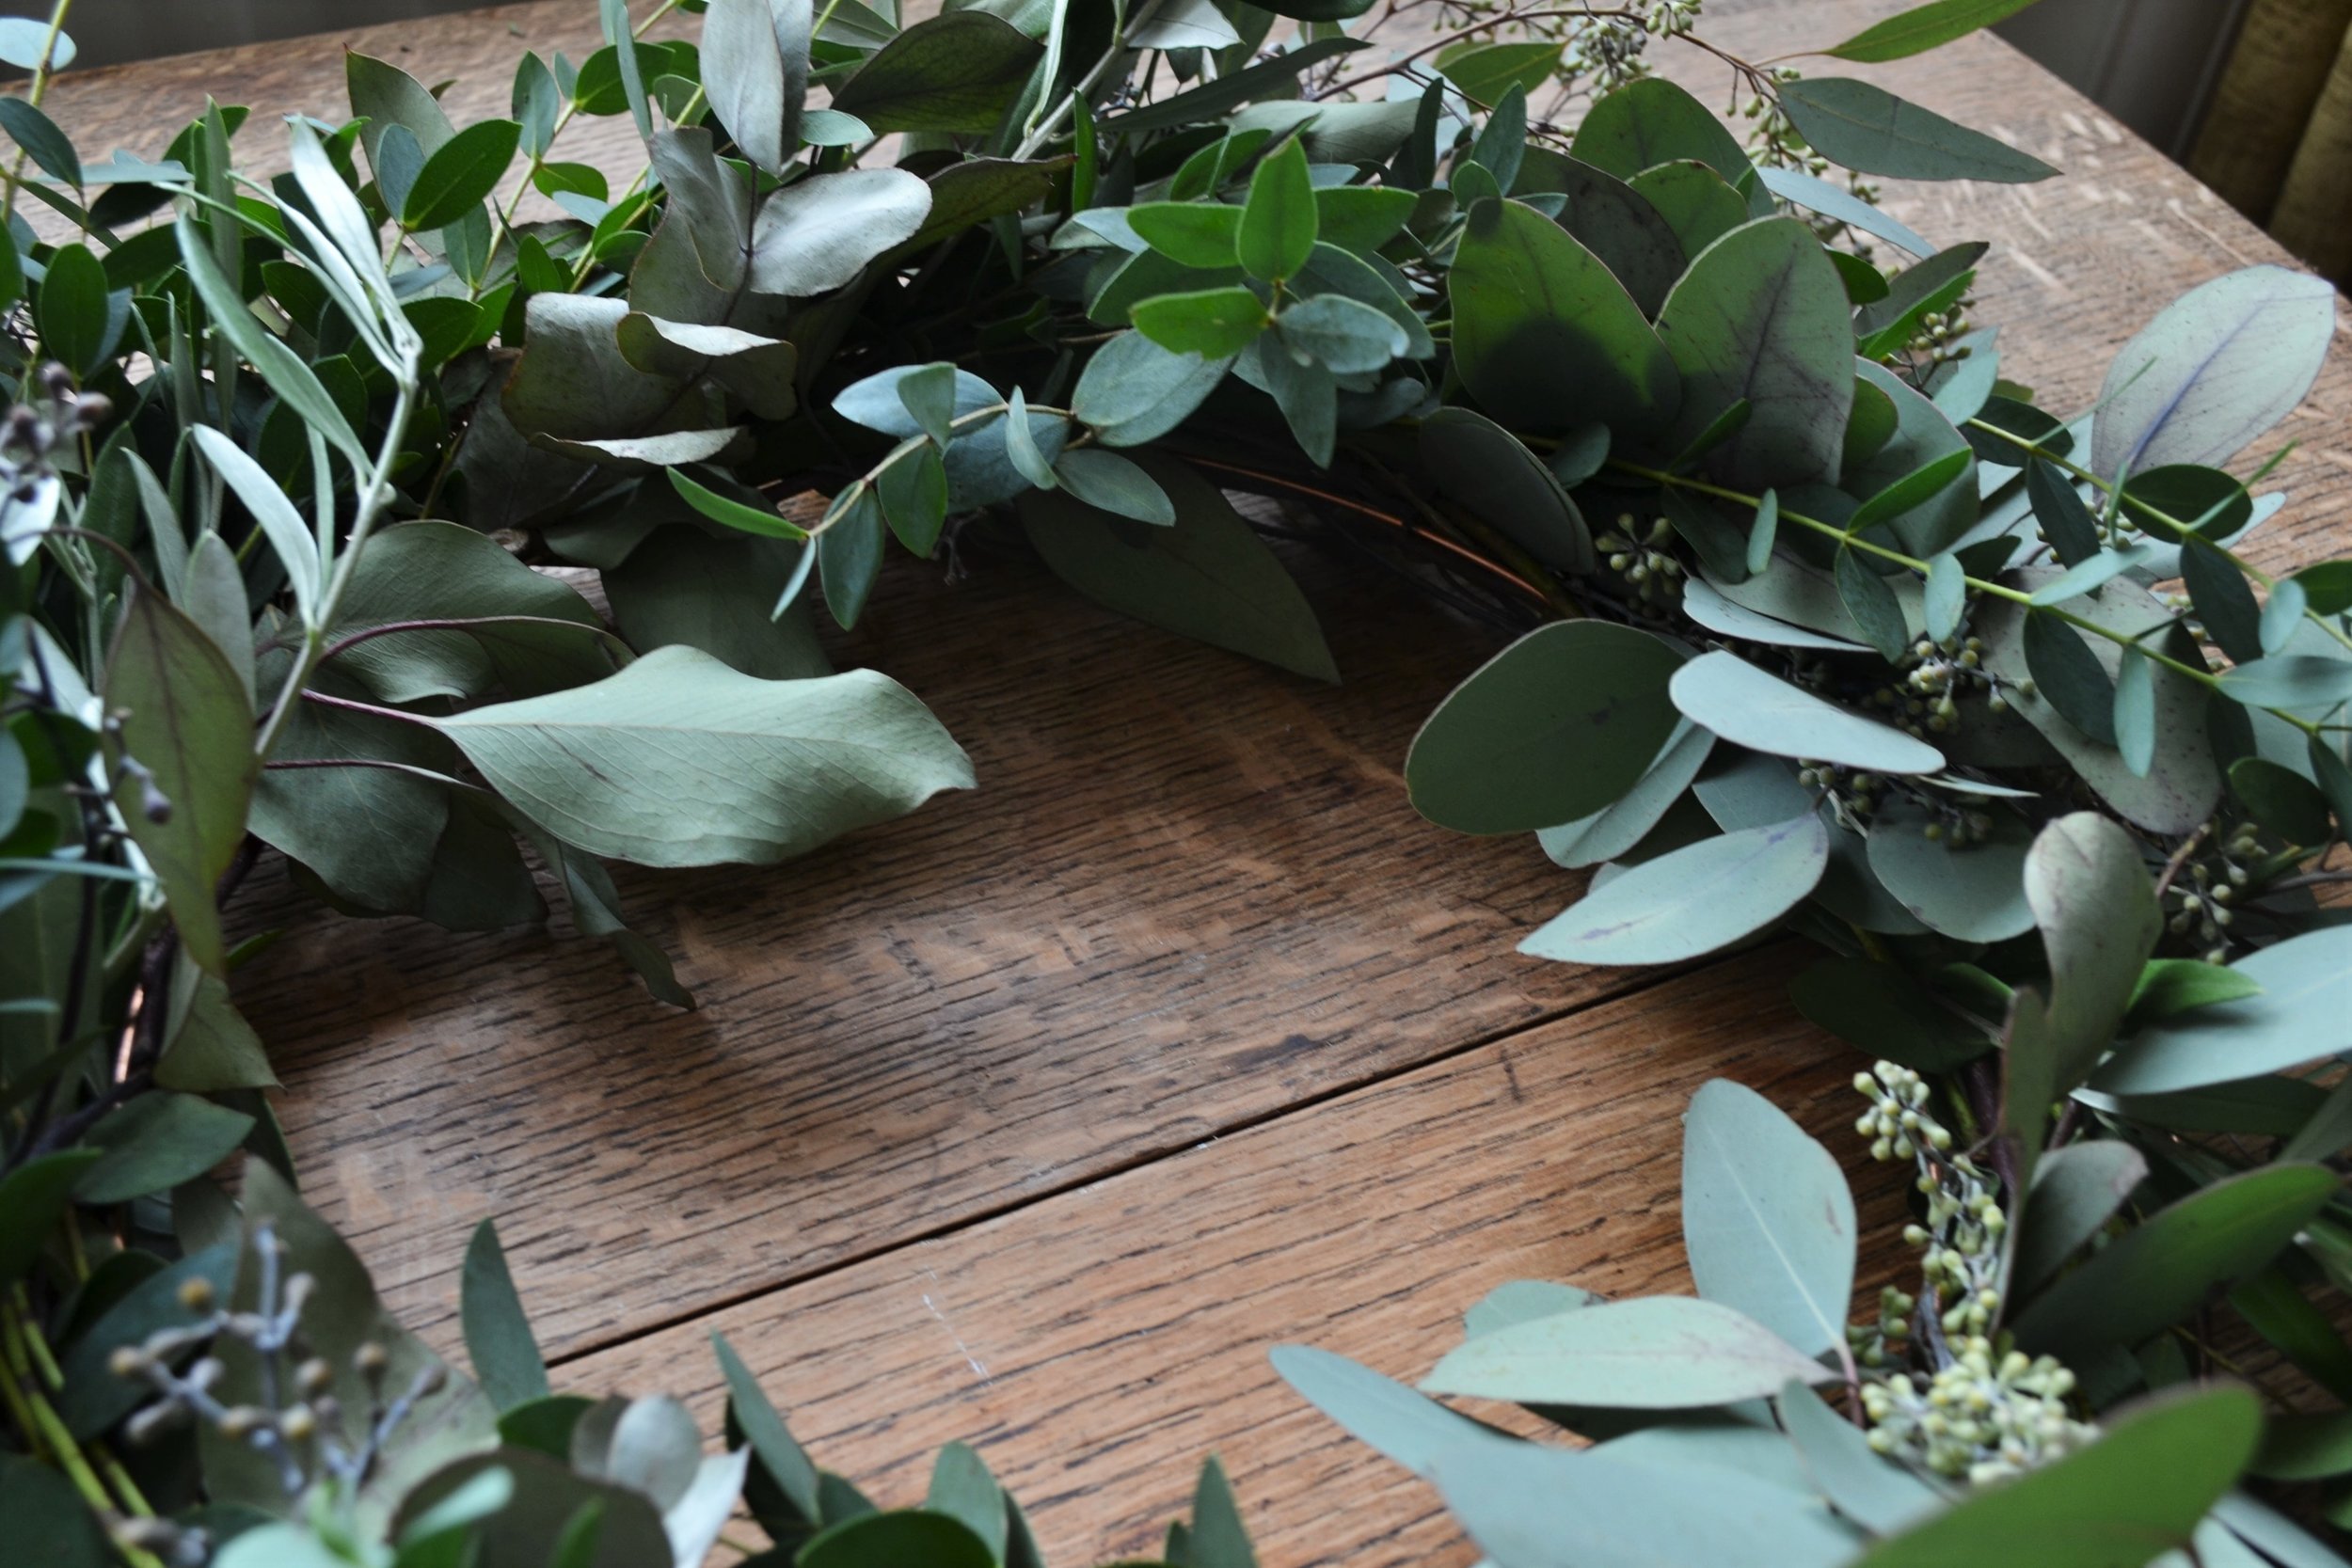
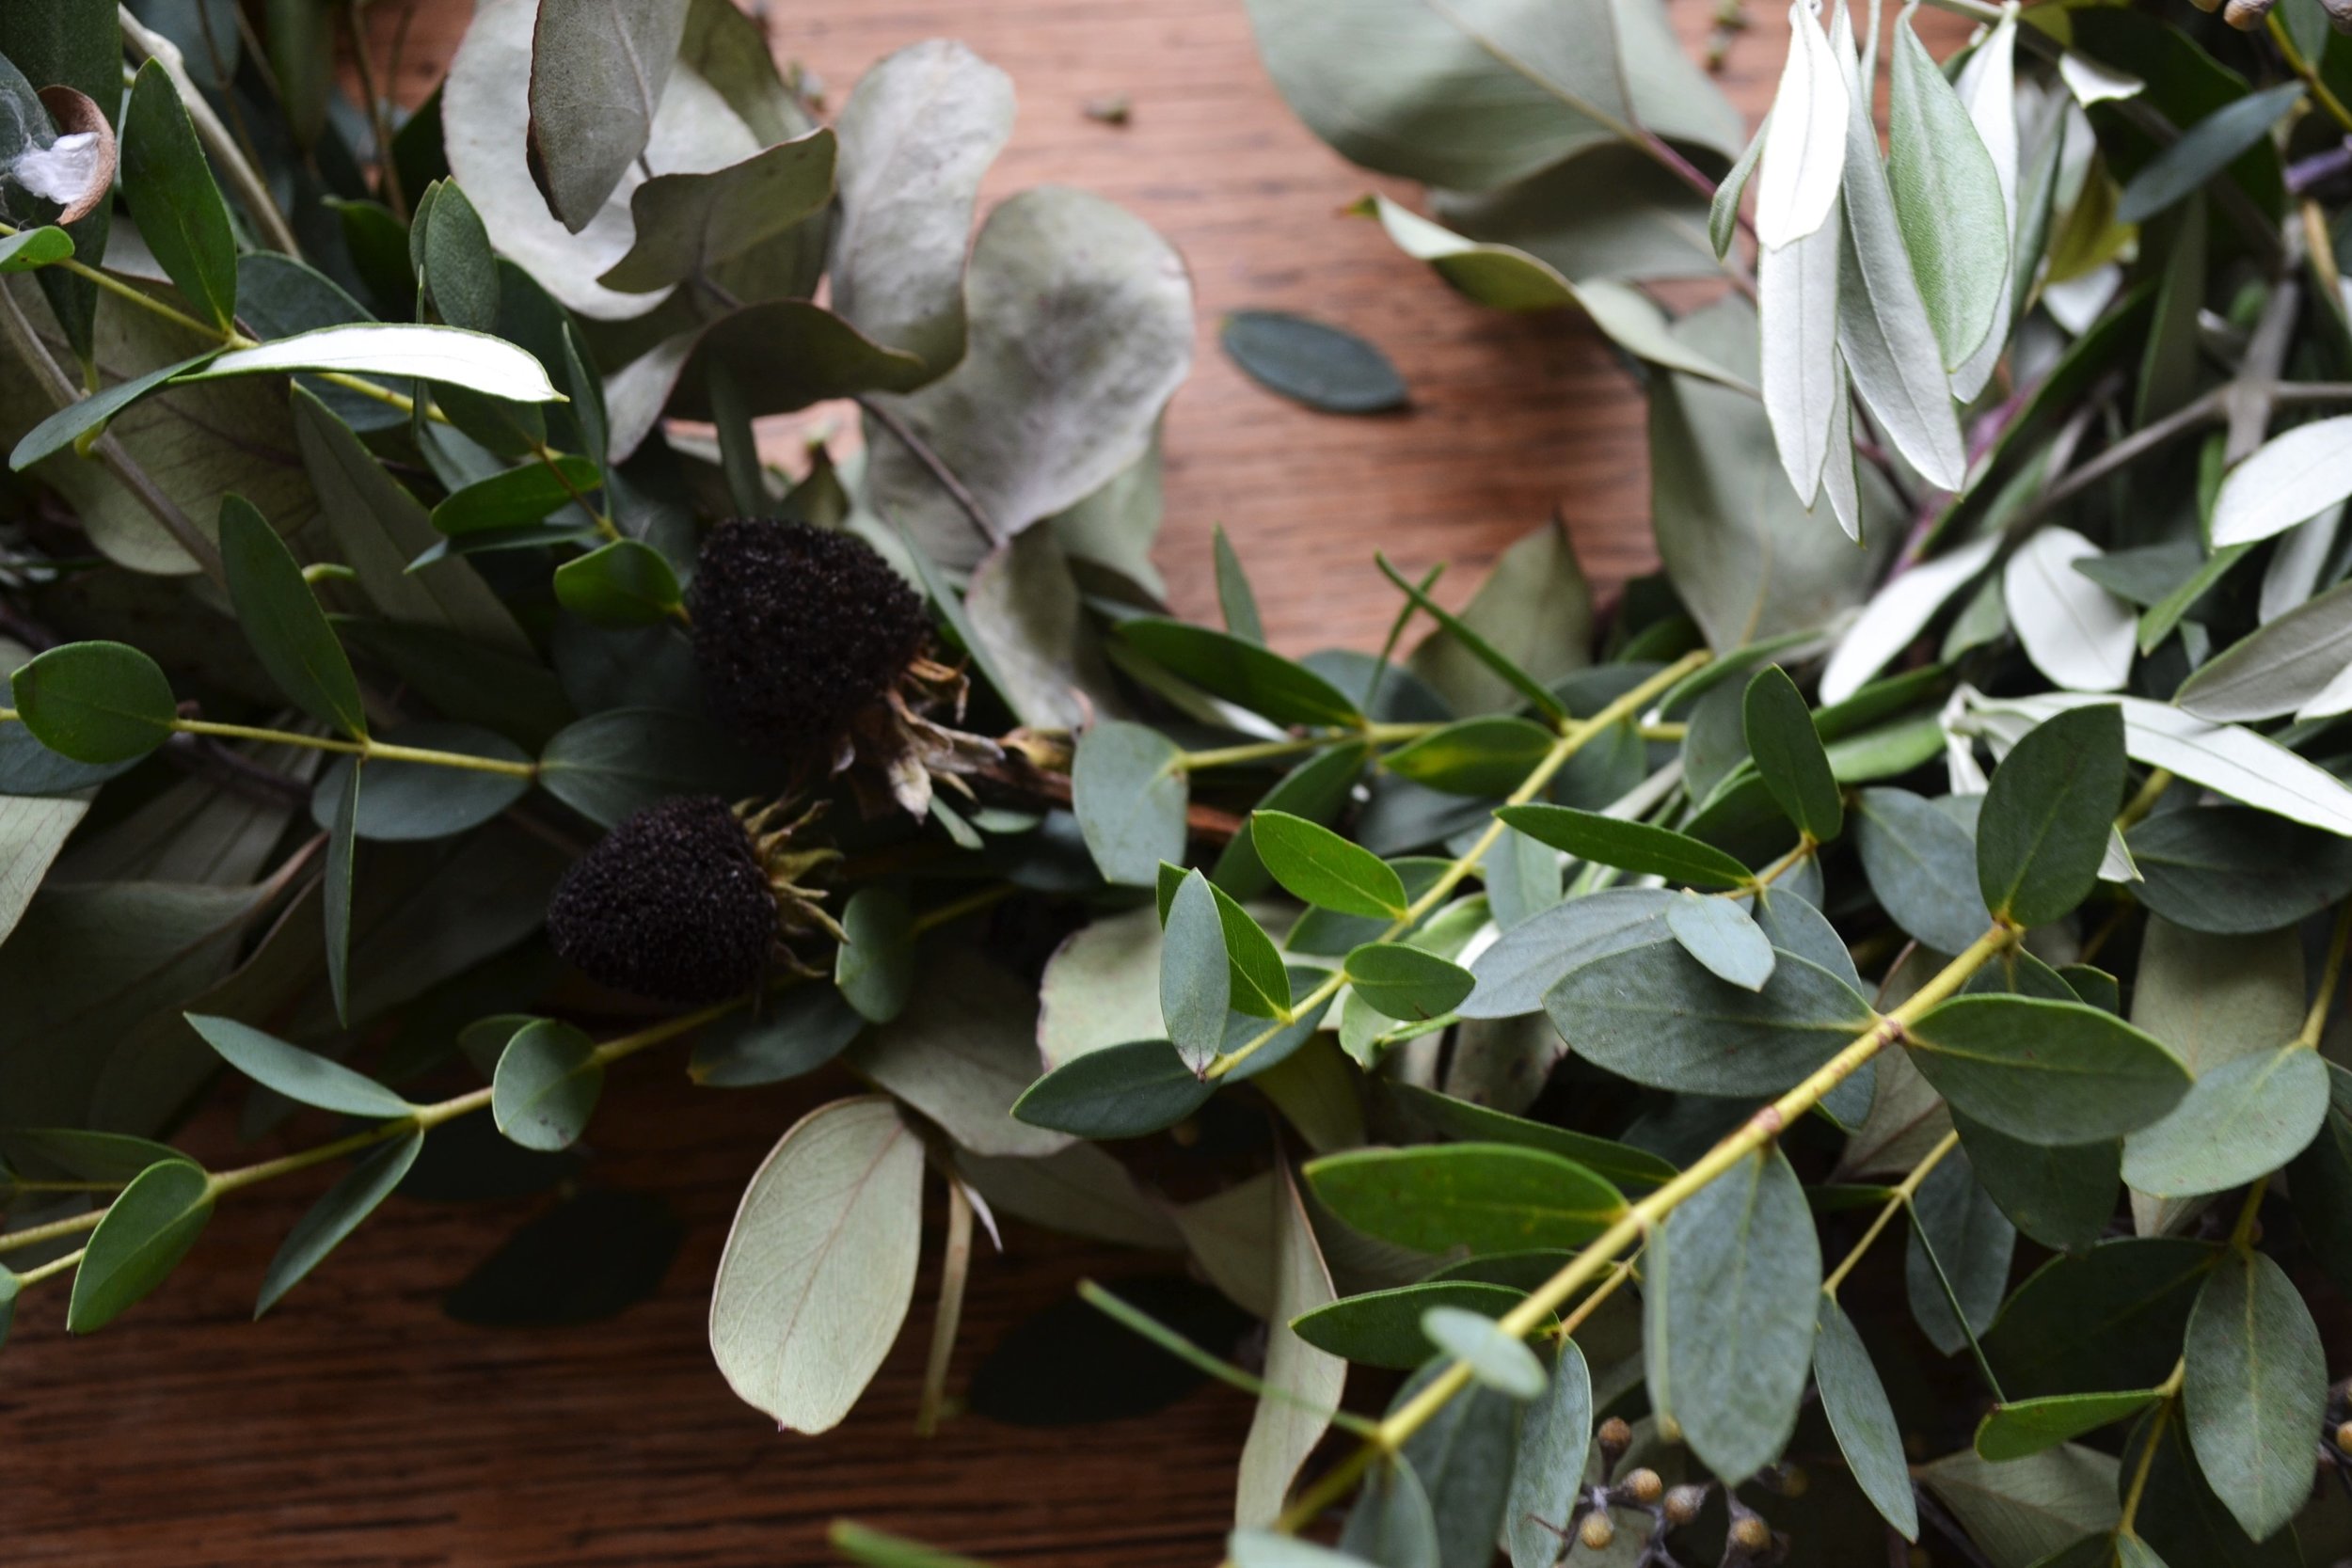
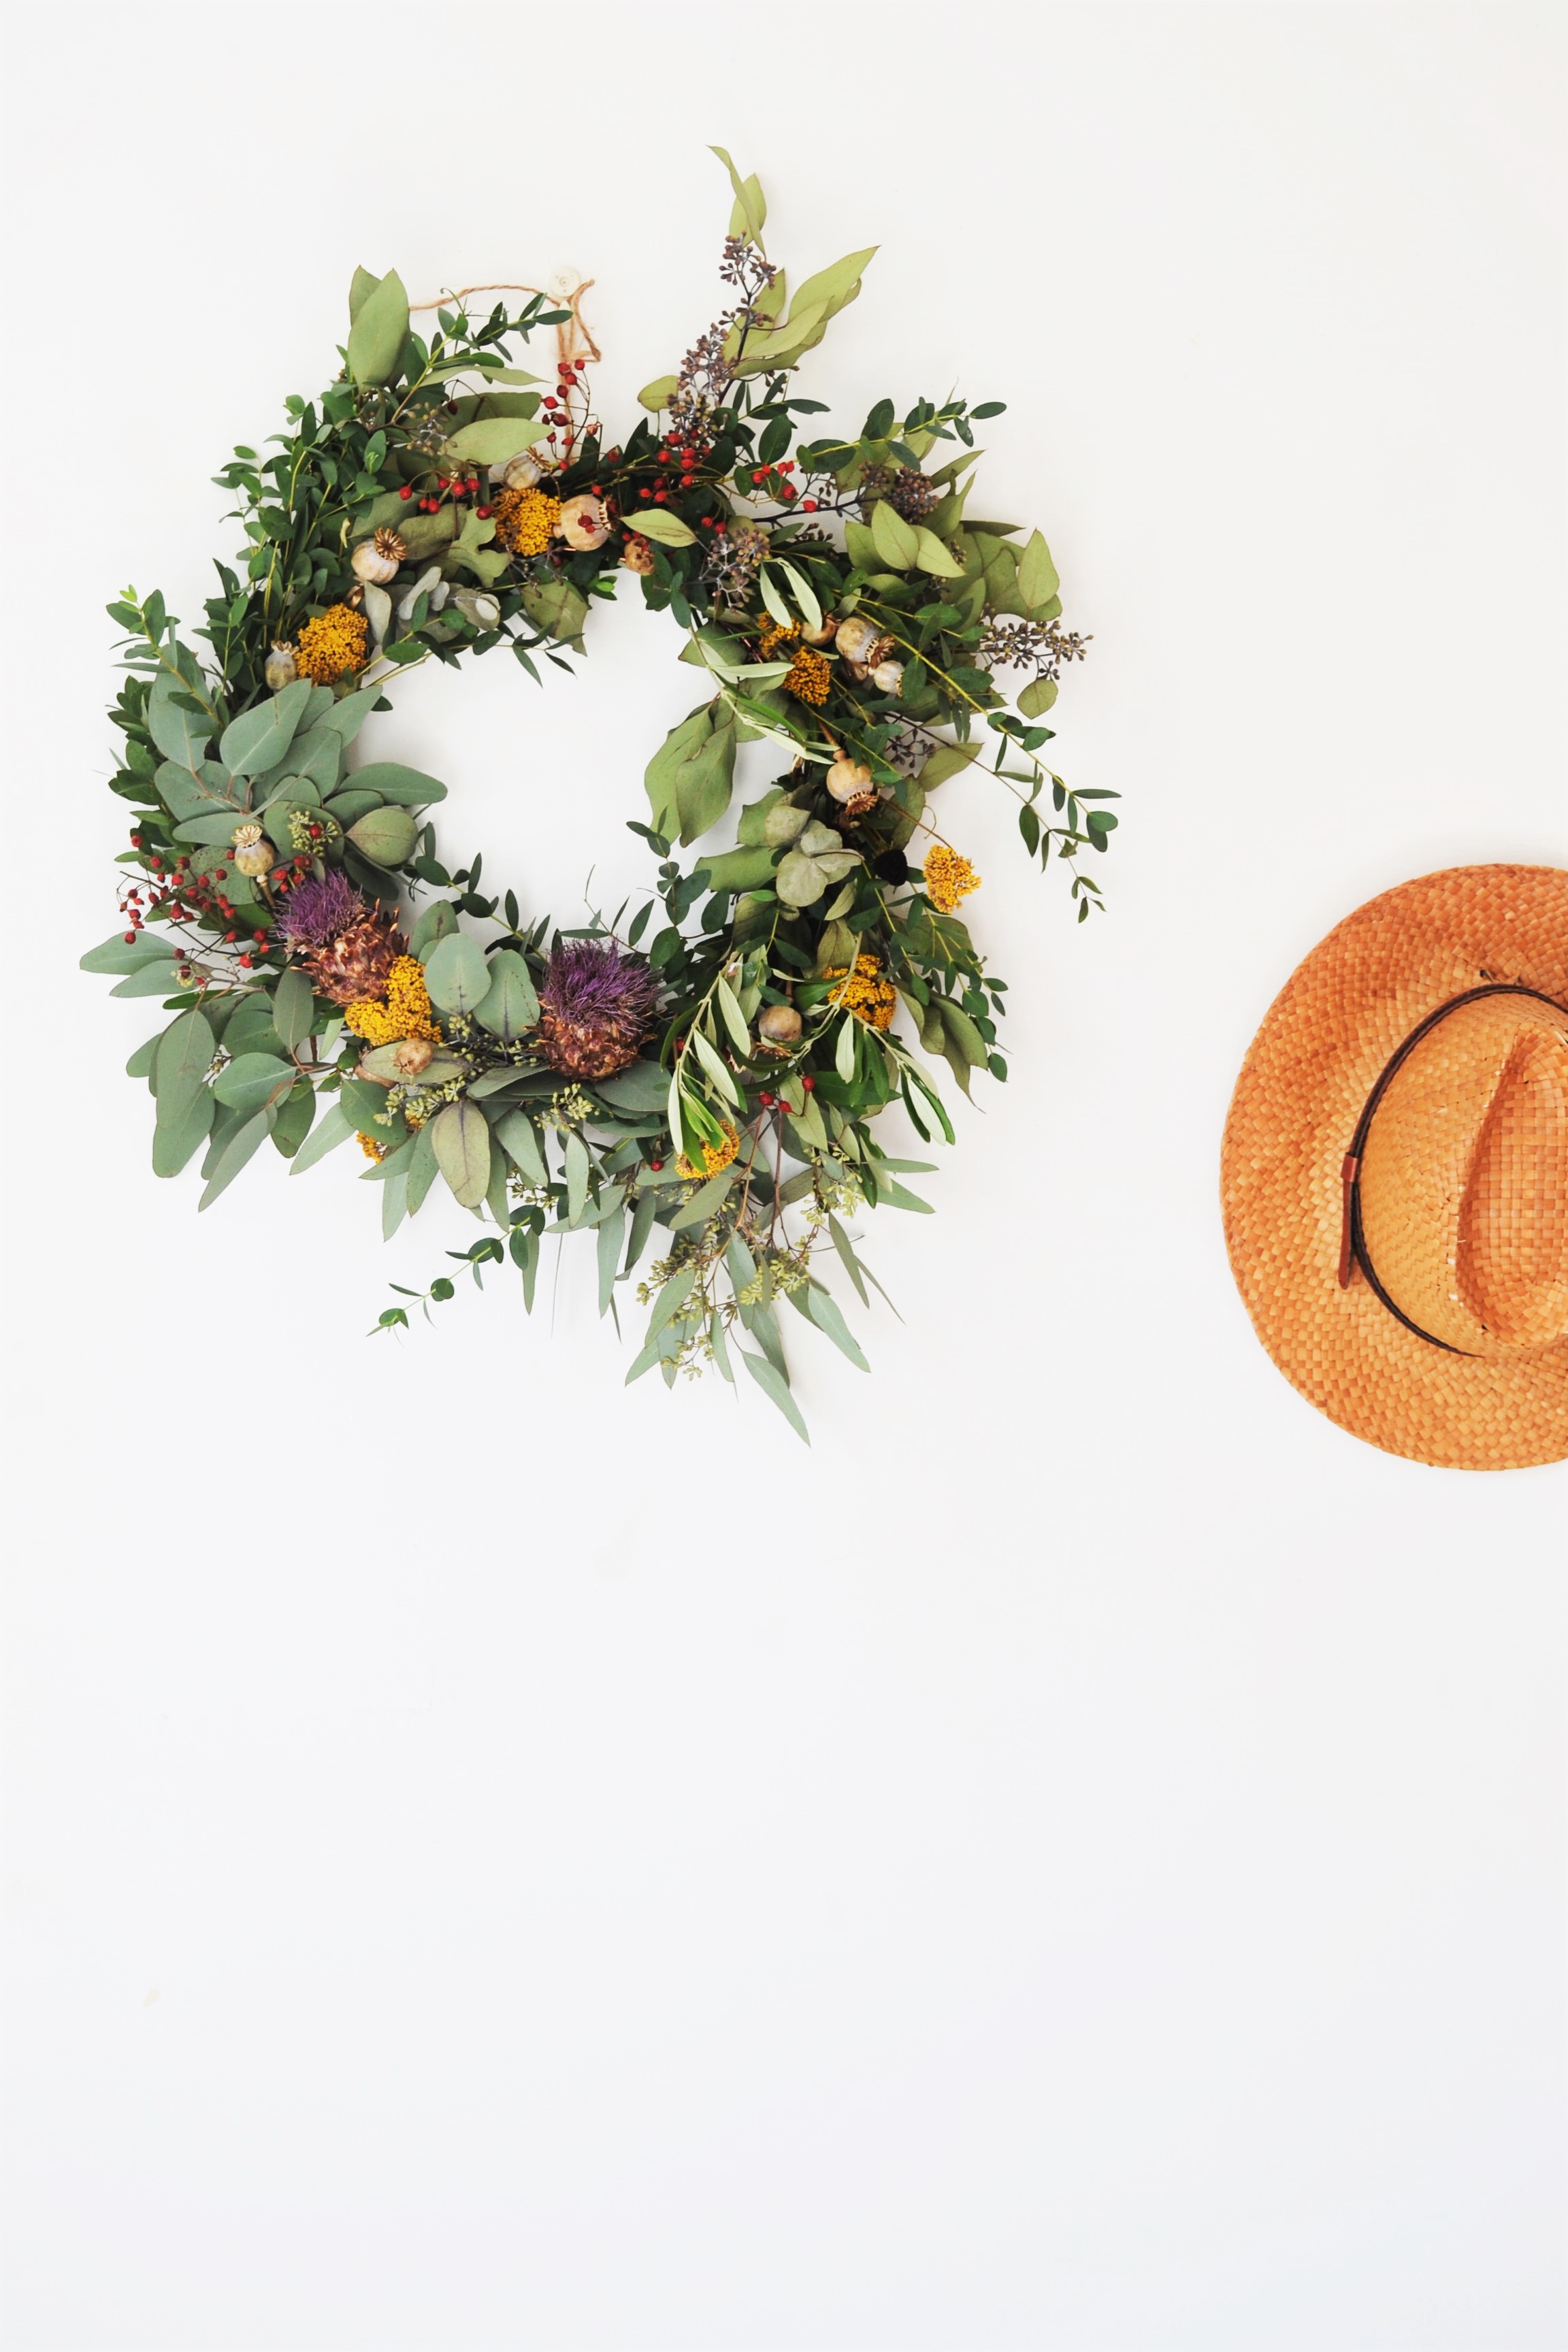
Here I’ve used: eucalyptus, parvifolia, olive leaves, nigella seed heads, dried poppy seed heads, achillea, echinacea heads, dried artichokes and rose hips. You can use whatever you can forage from your garden, and anything from a dried out bouquet. Foliage-wise it’s good to use foliage that dries well like eucalyptus, olive leaves, bay leaves or rosemary. I would avoid ivy as that shrivels up quite quickly and doesn’t hold its shape well when it dries.
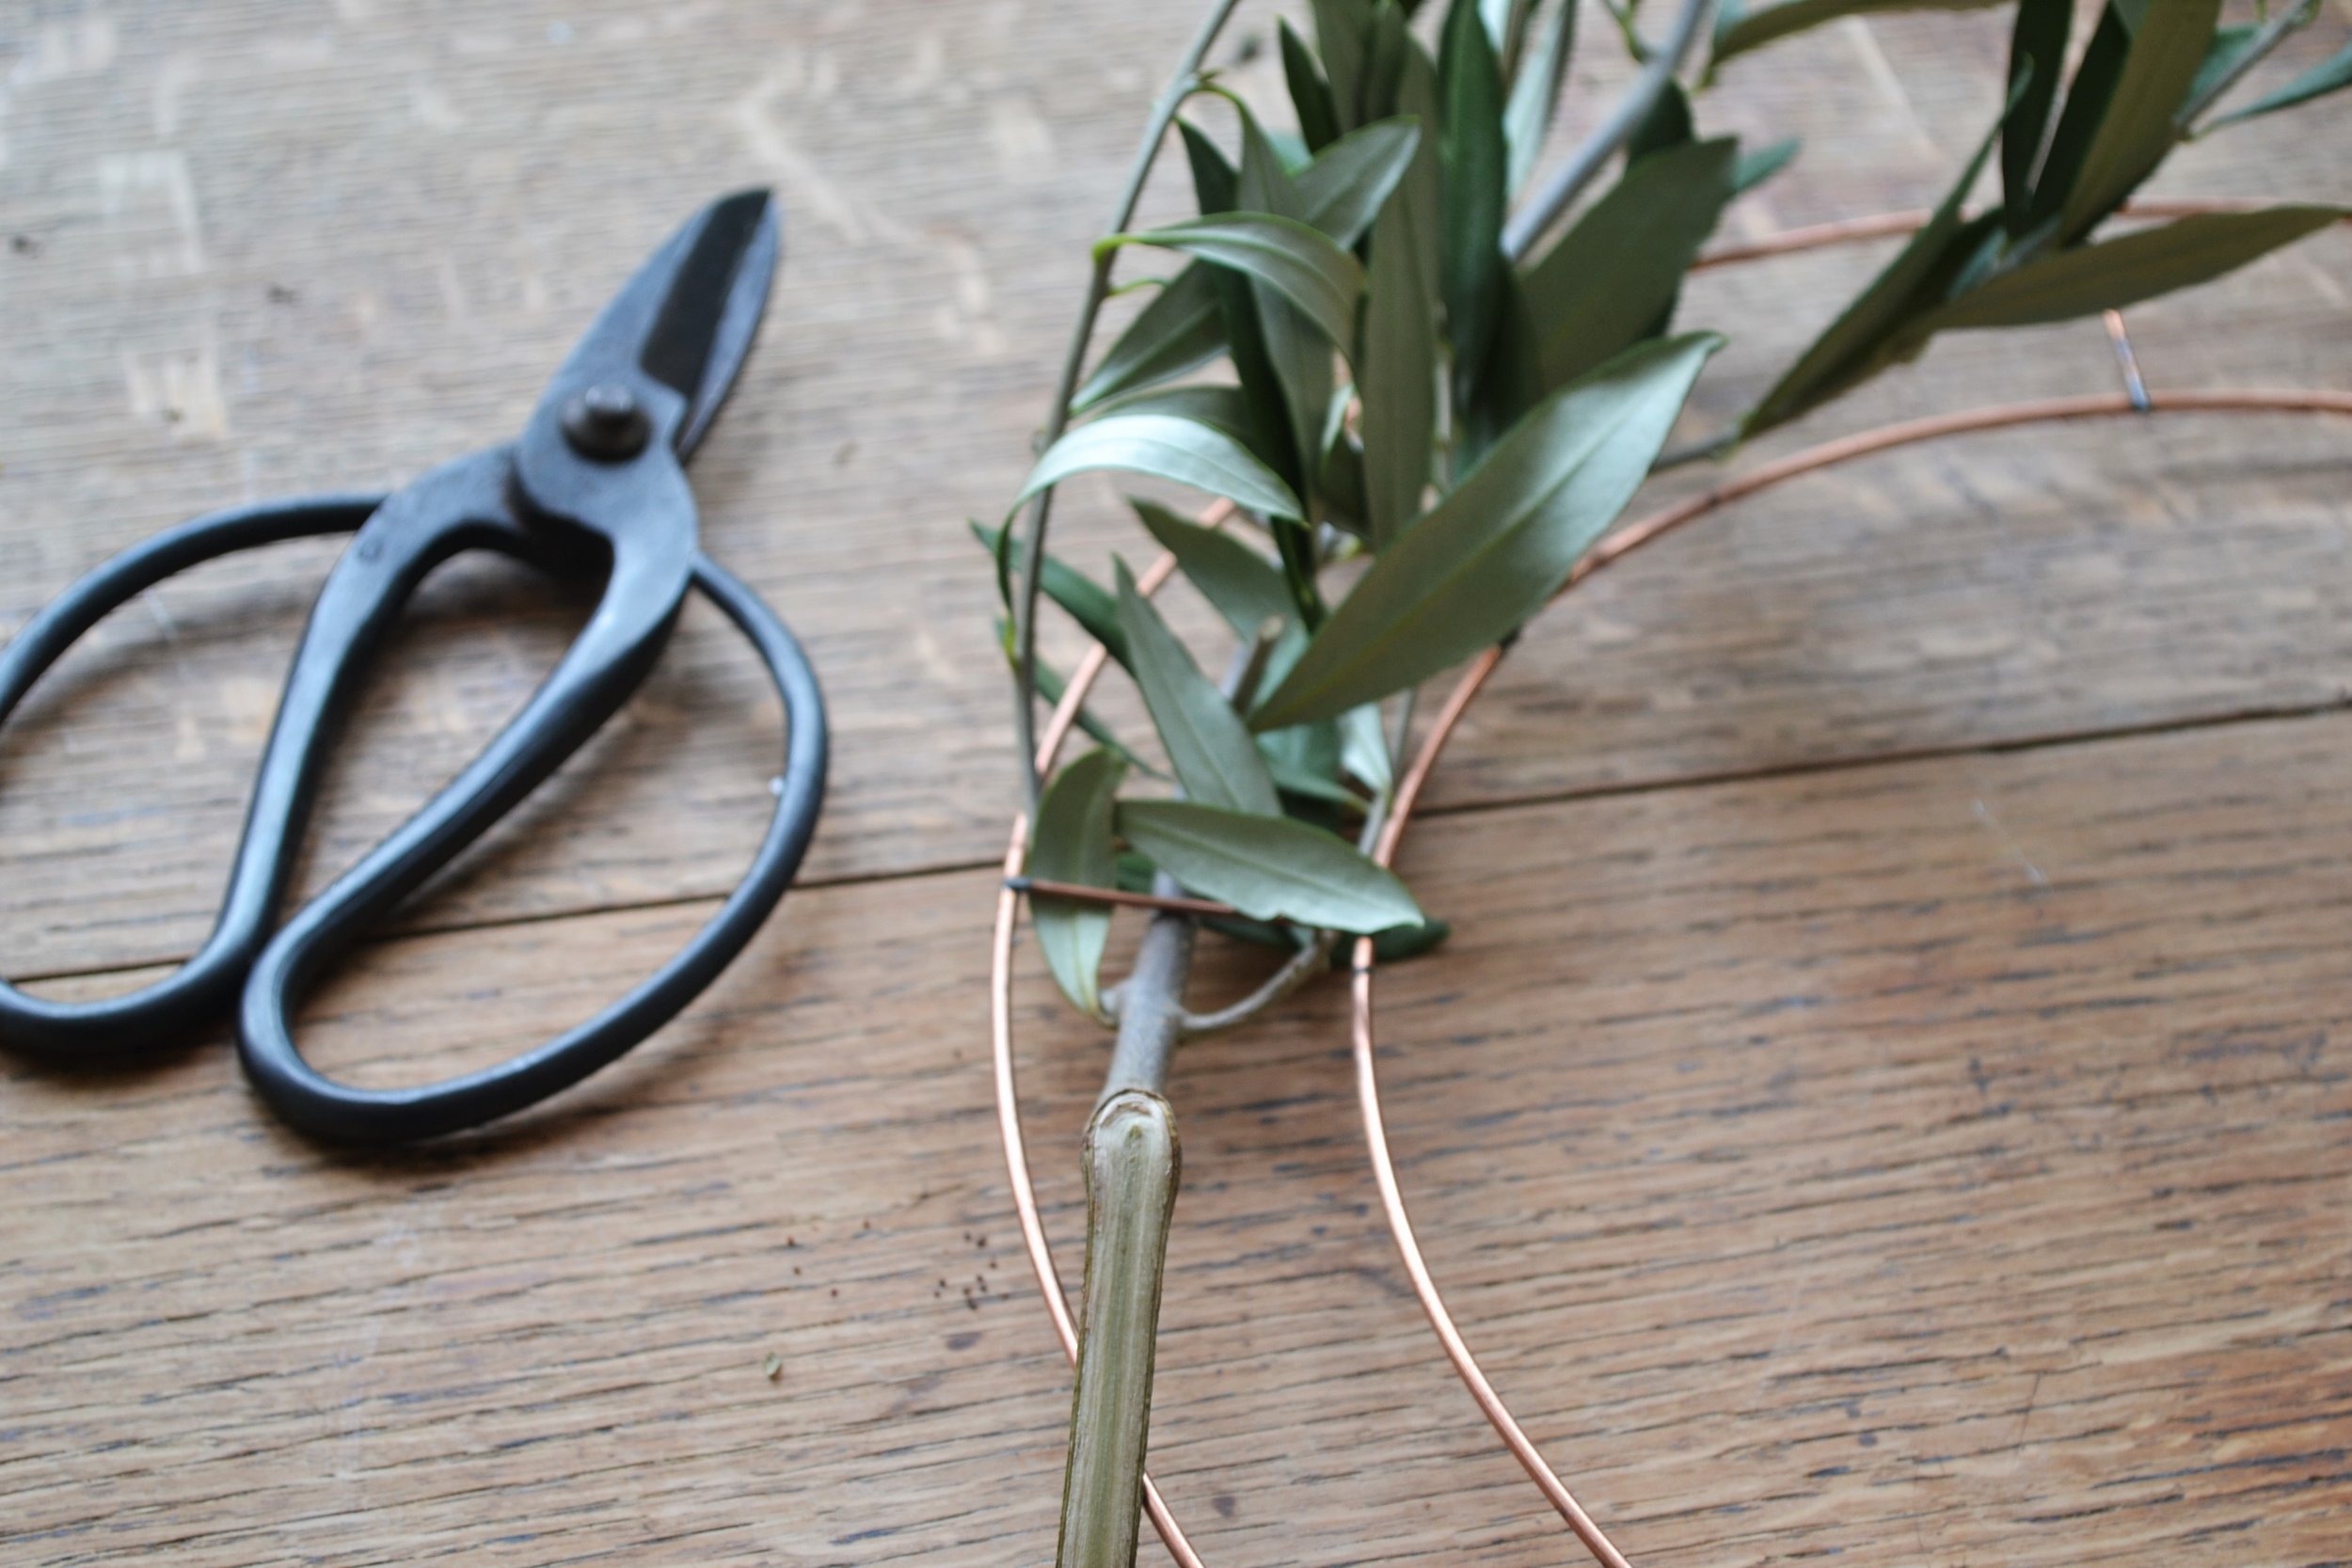
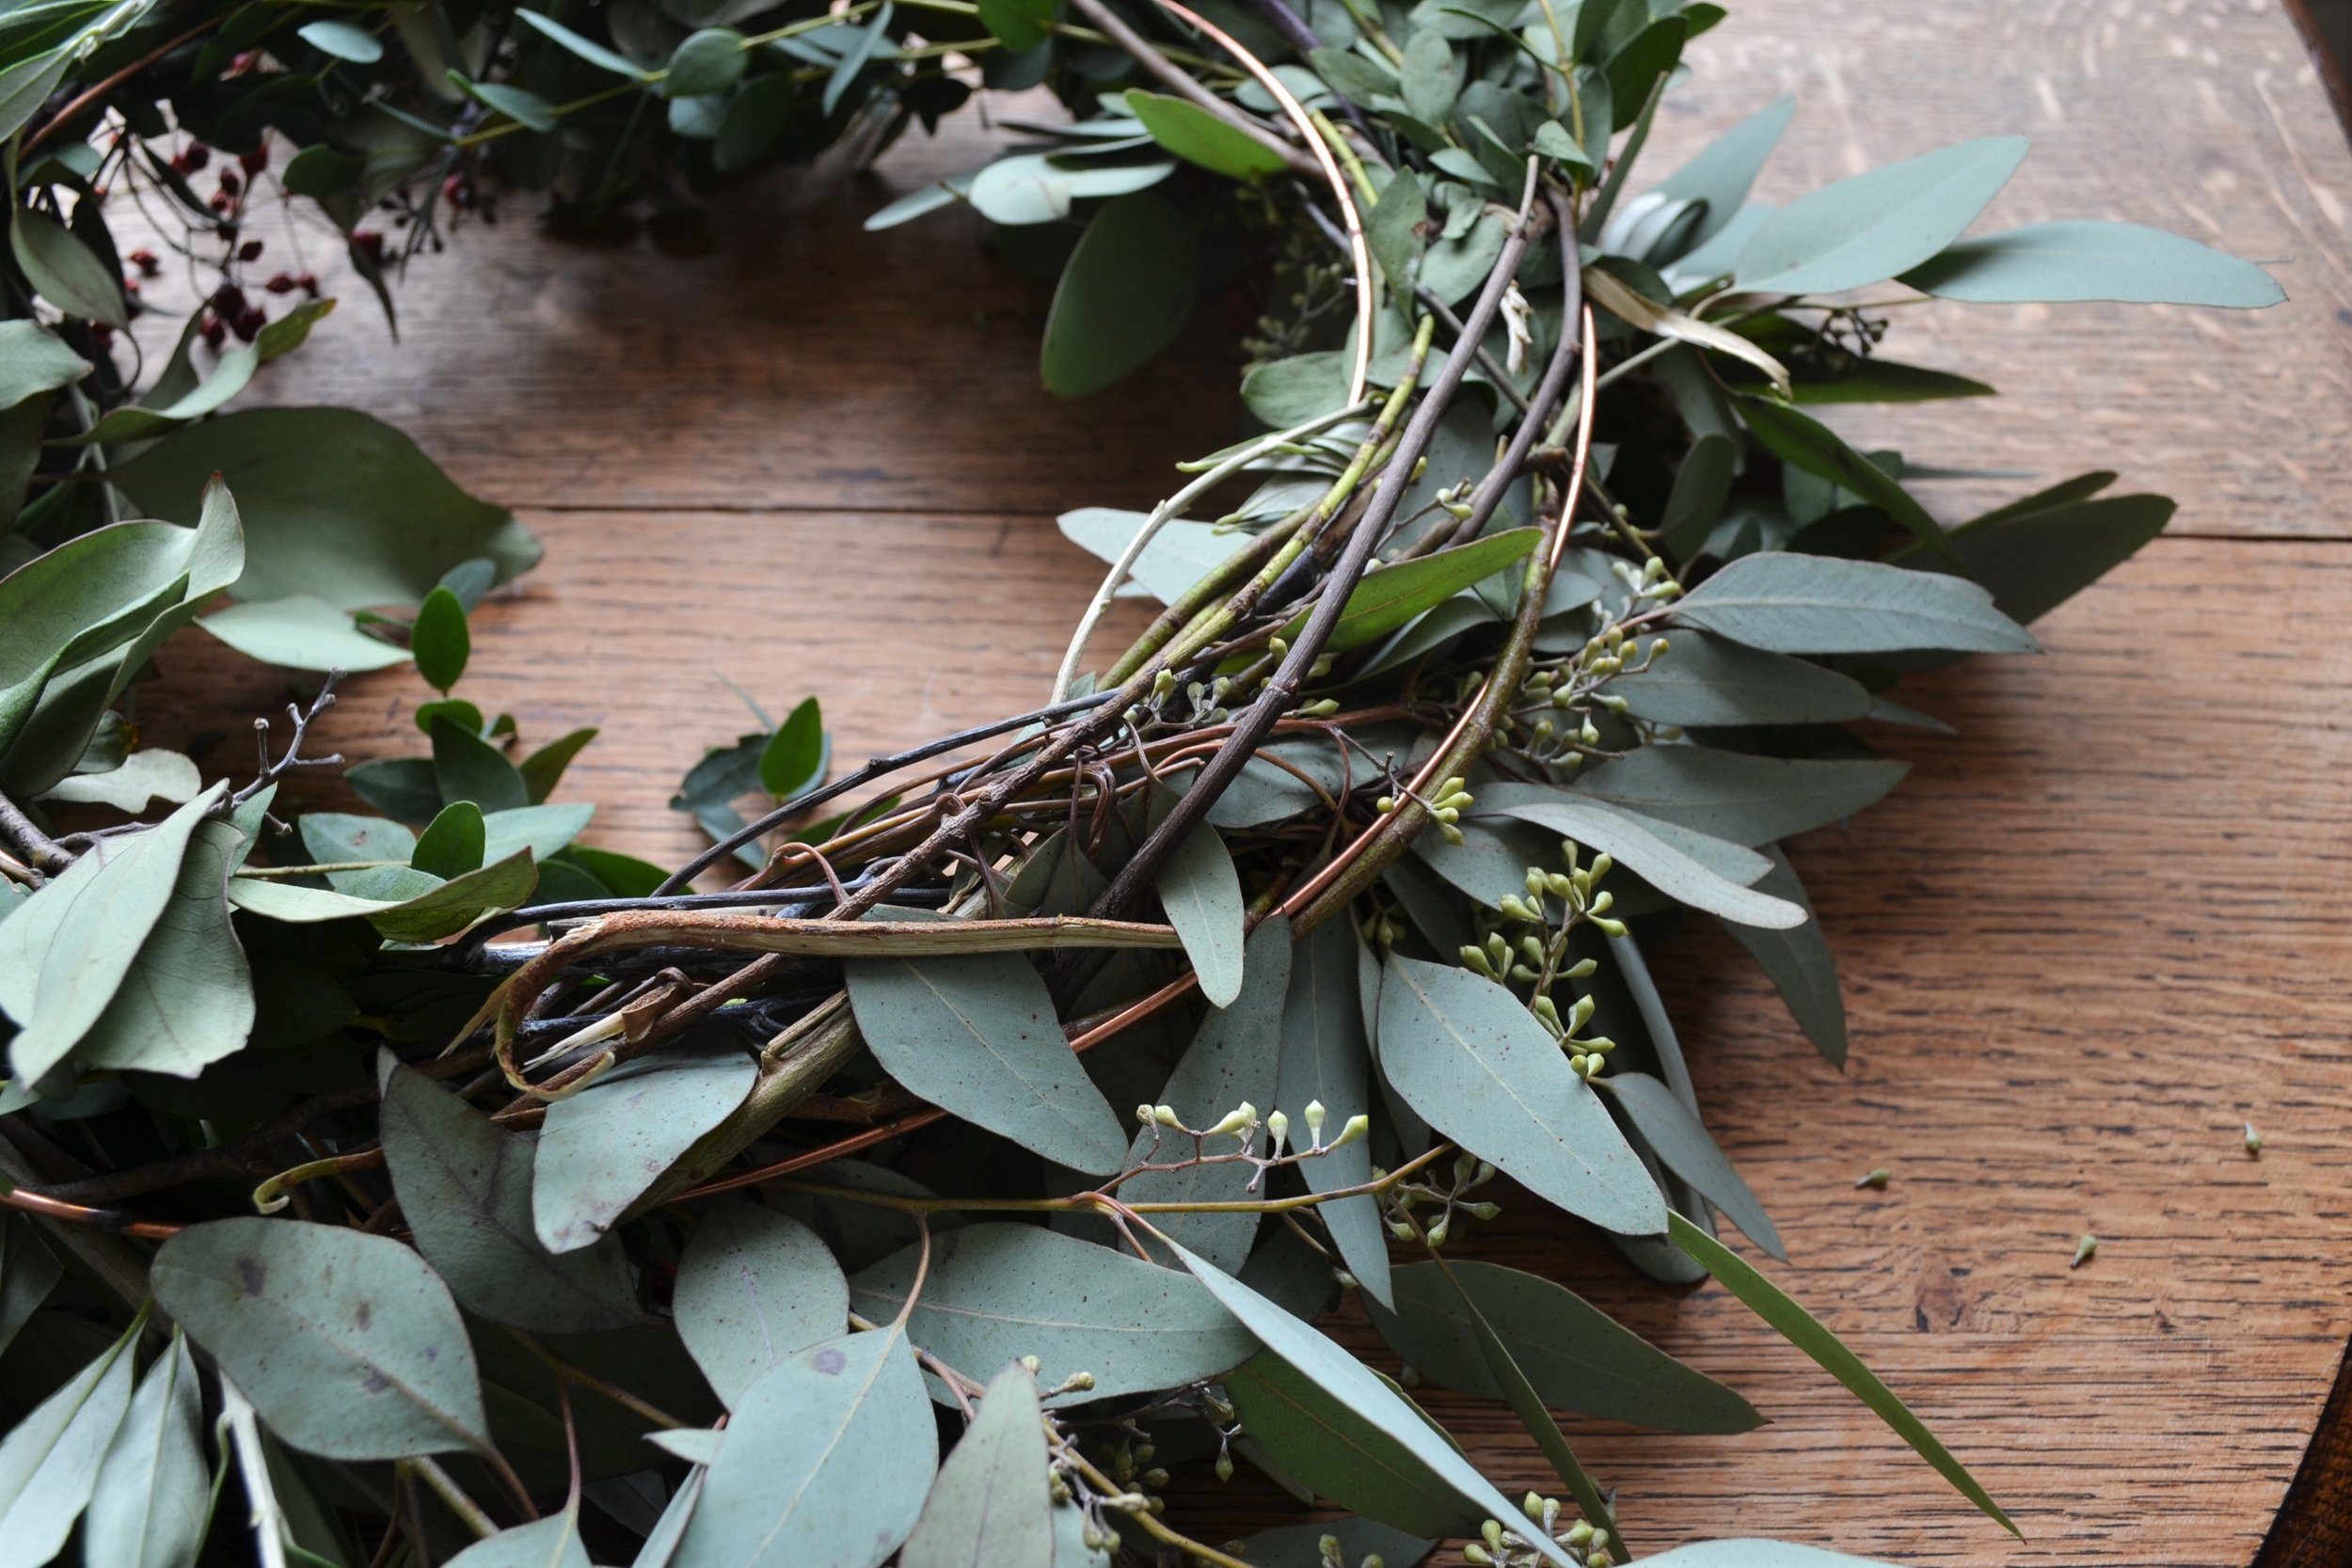
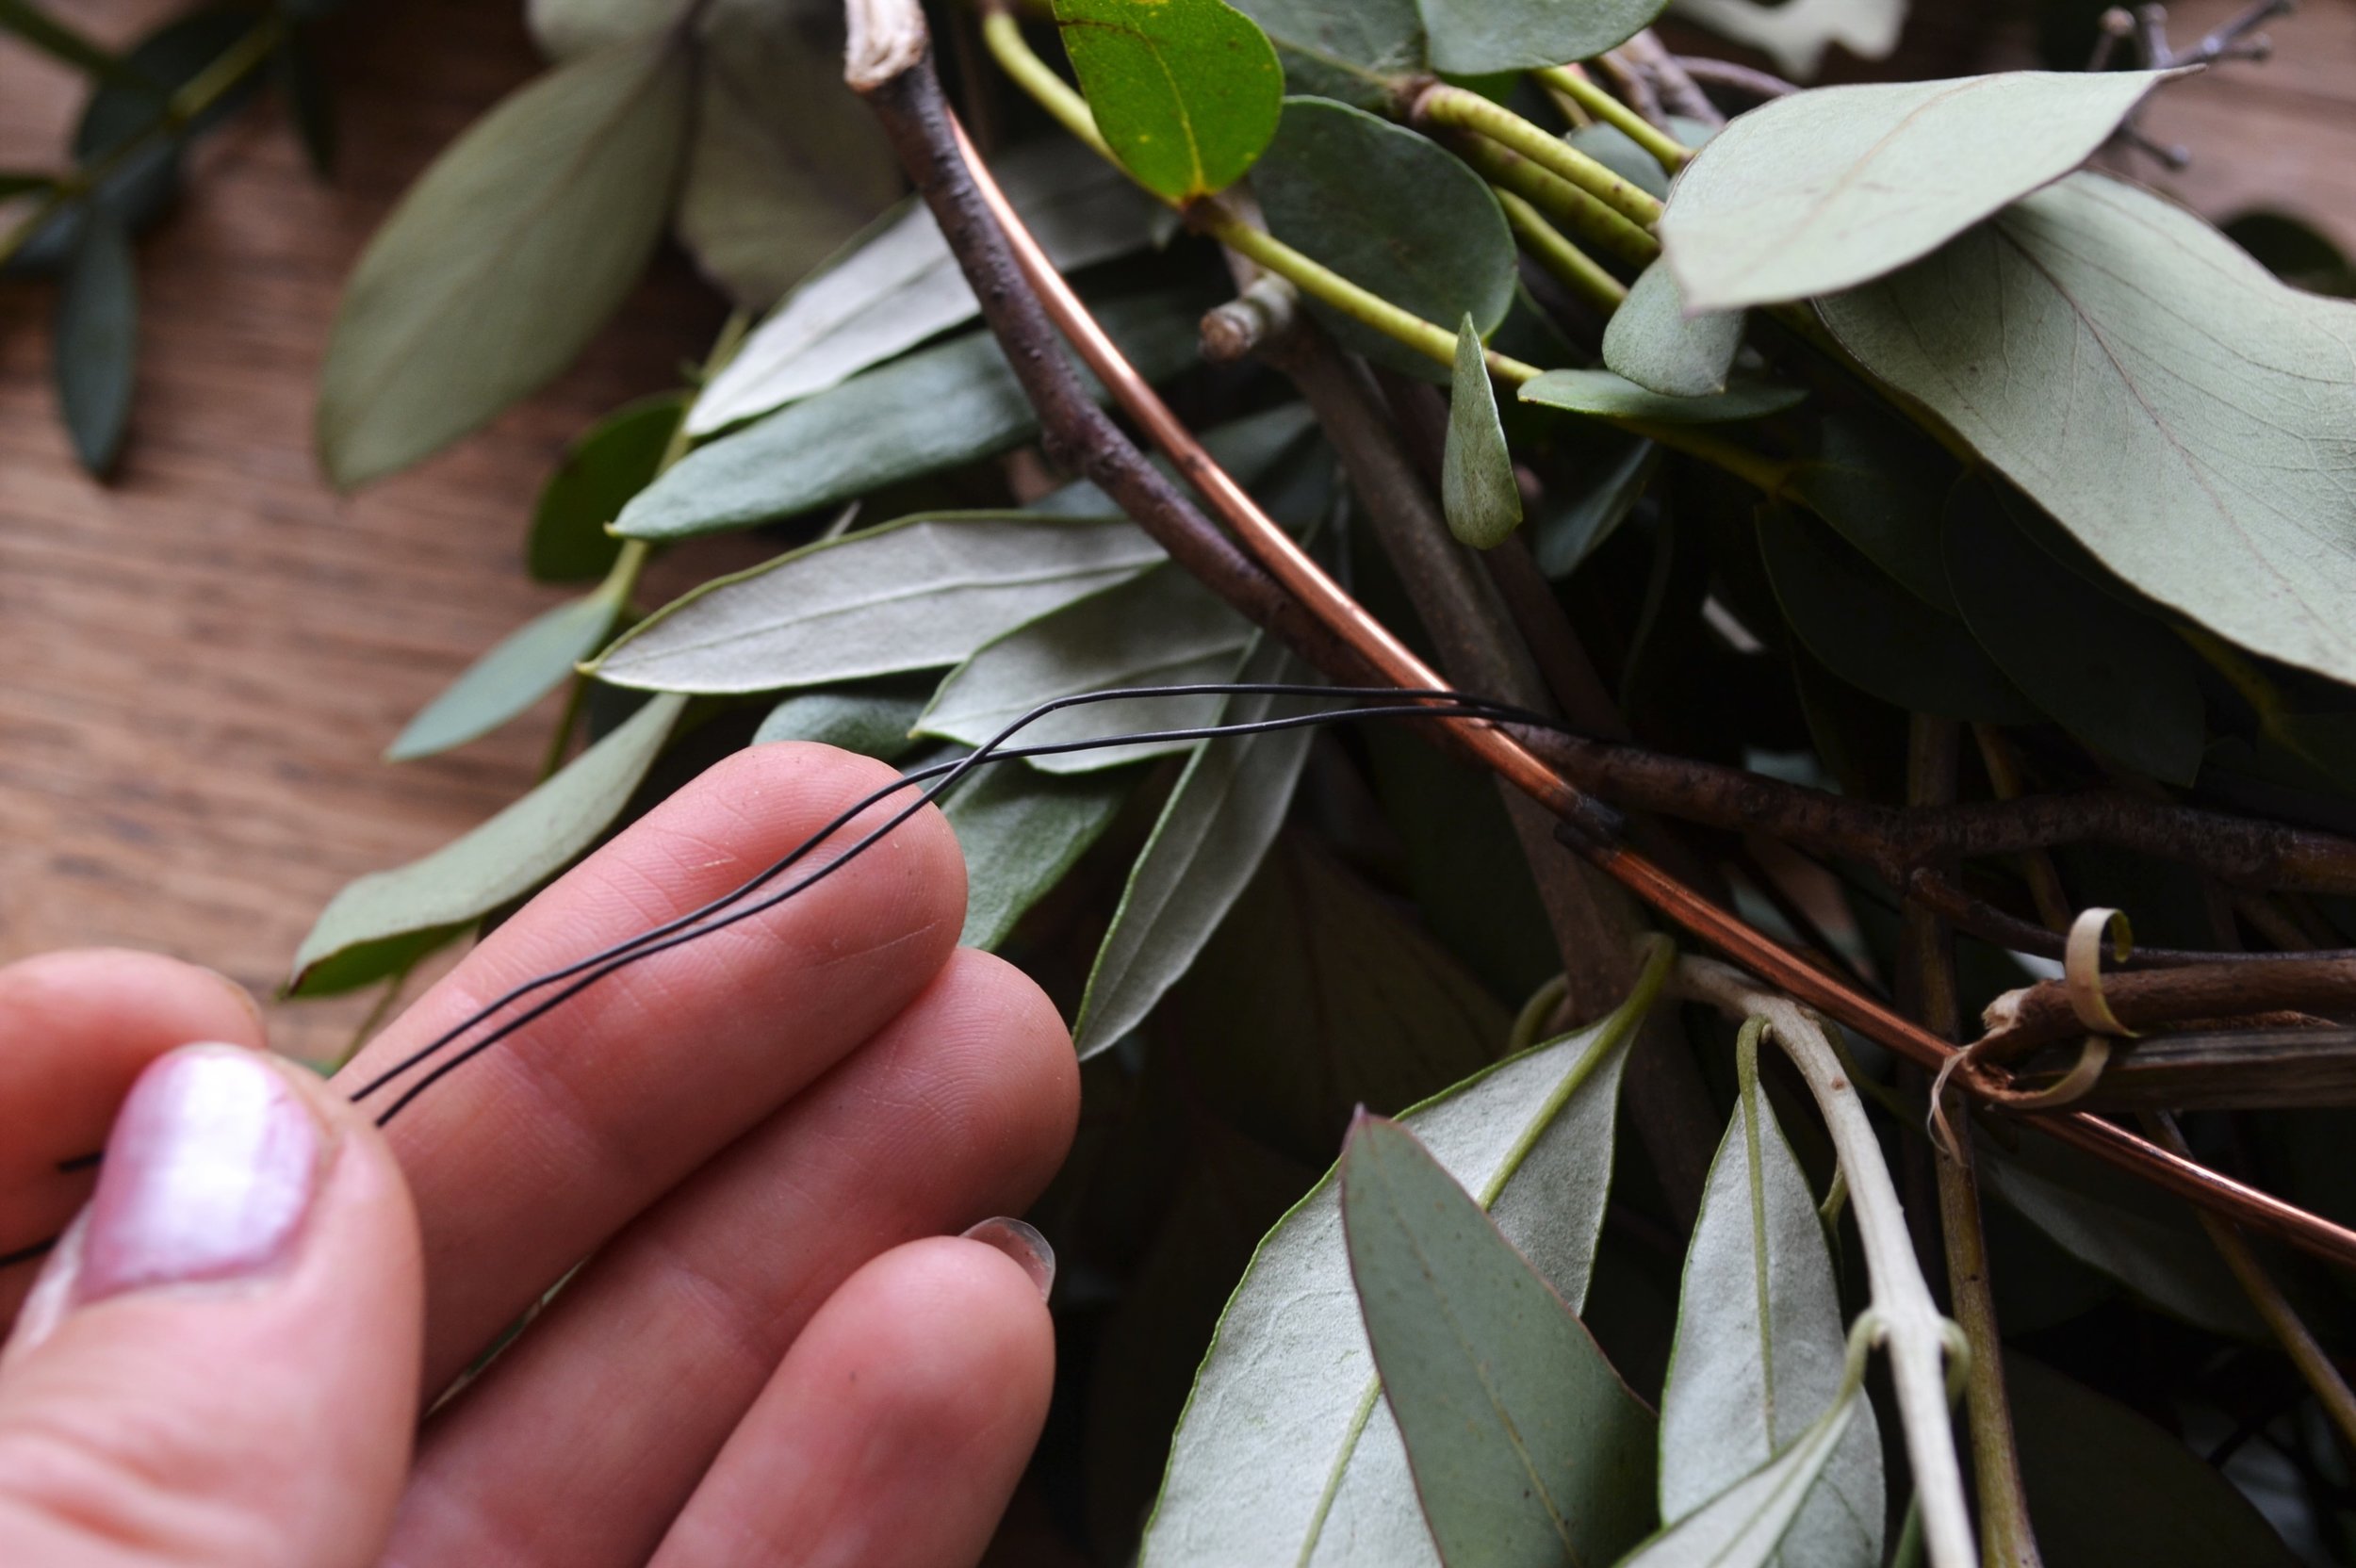
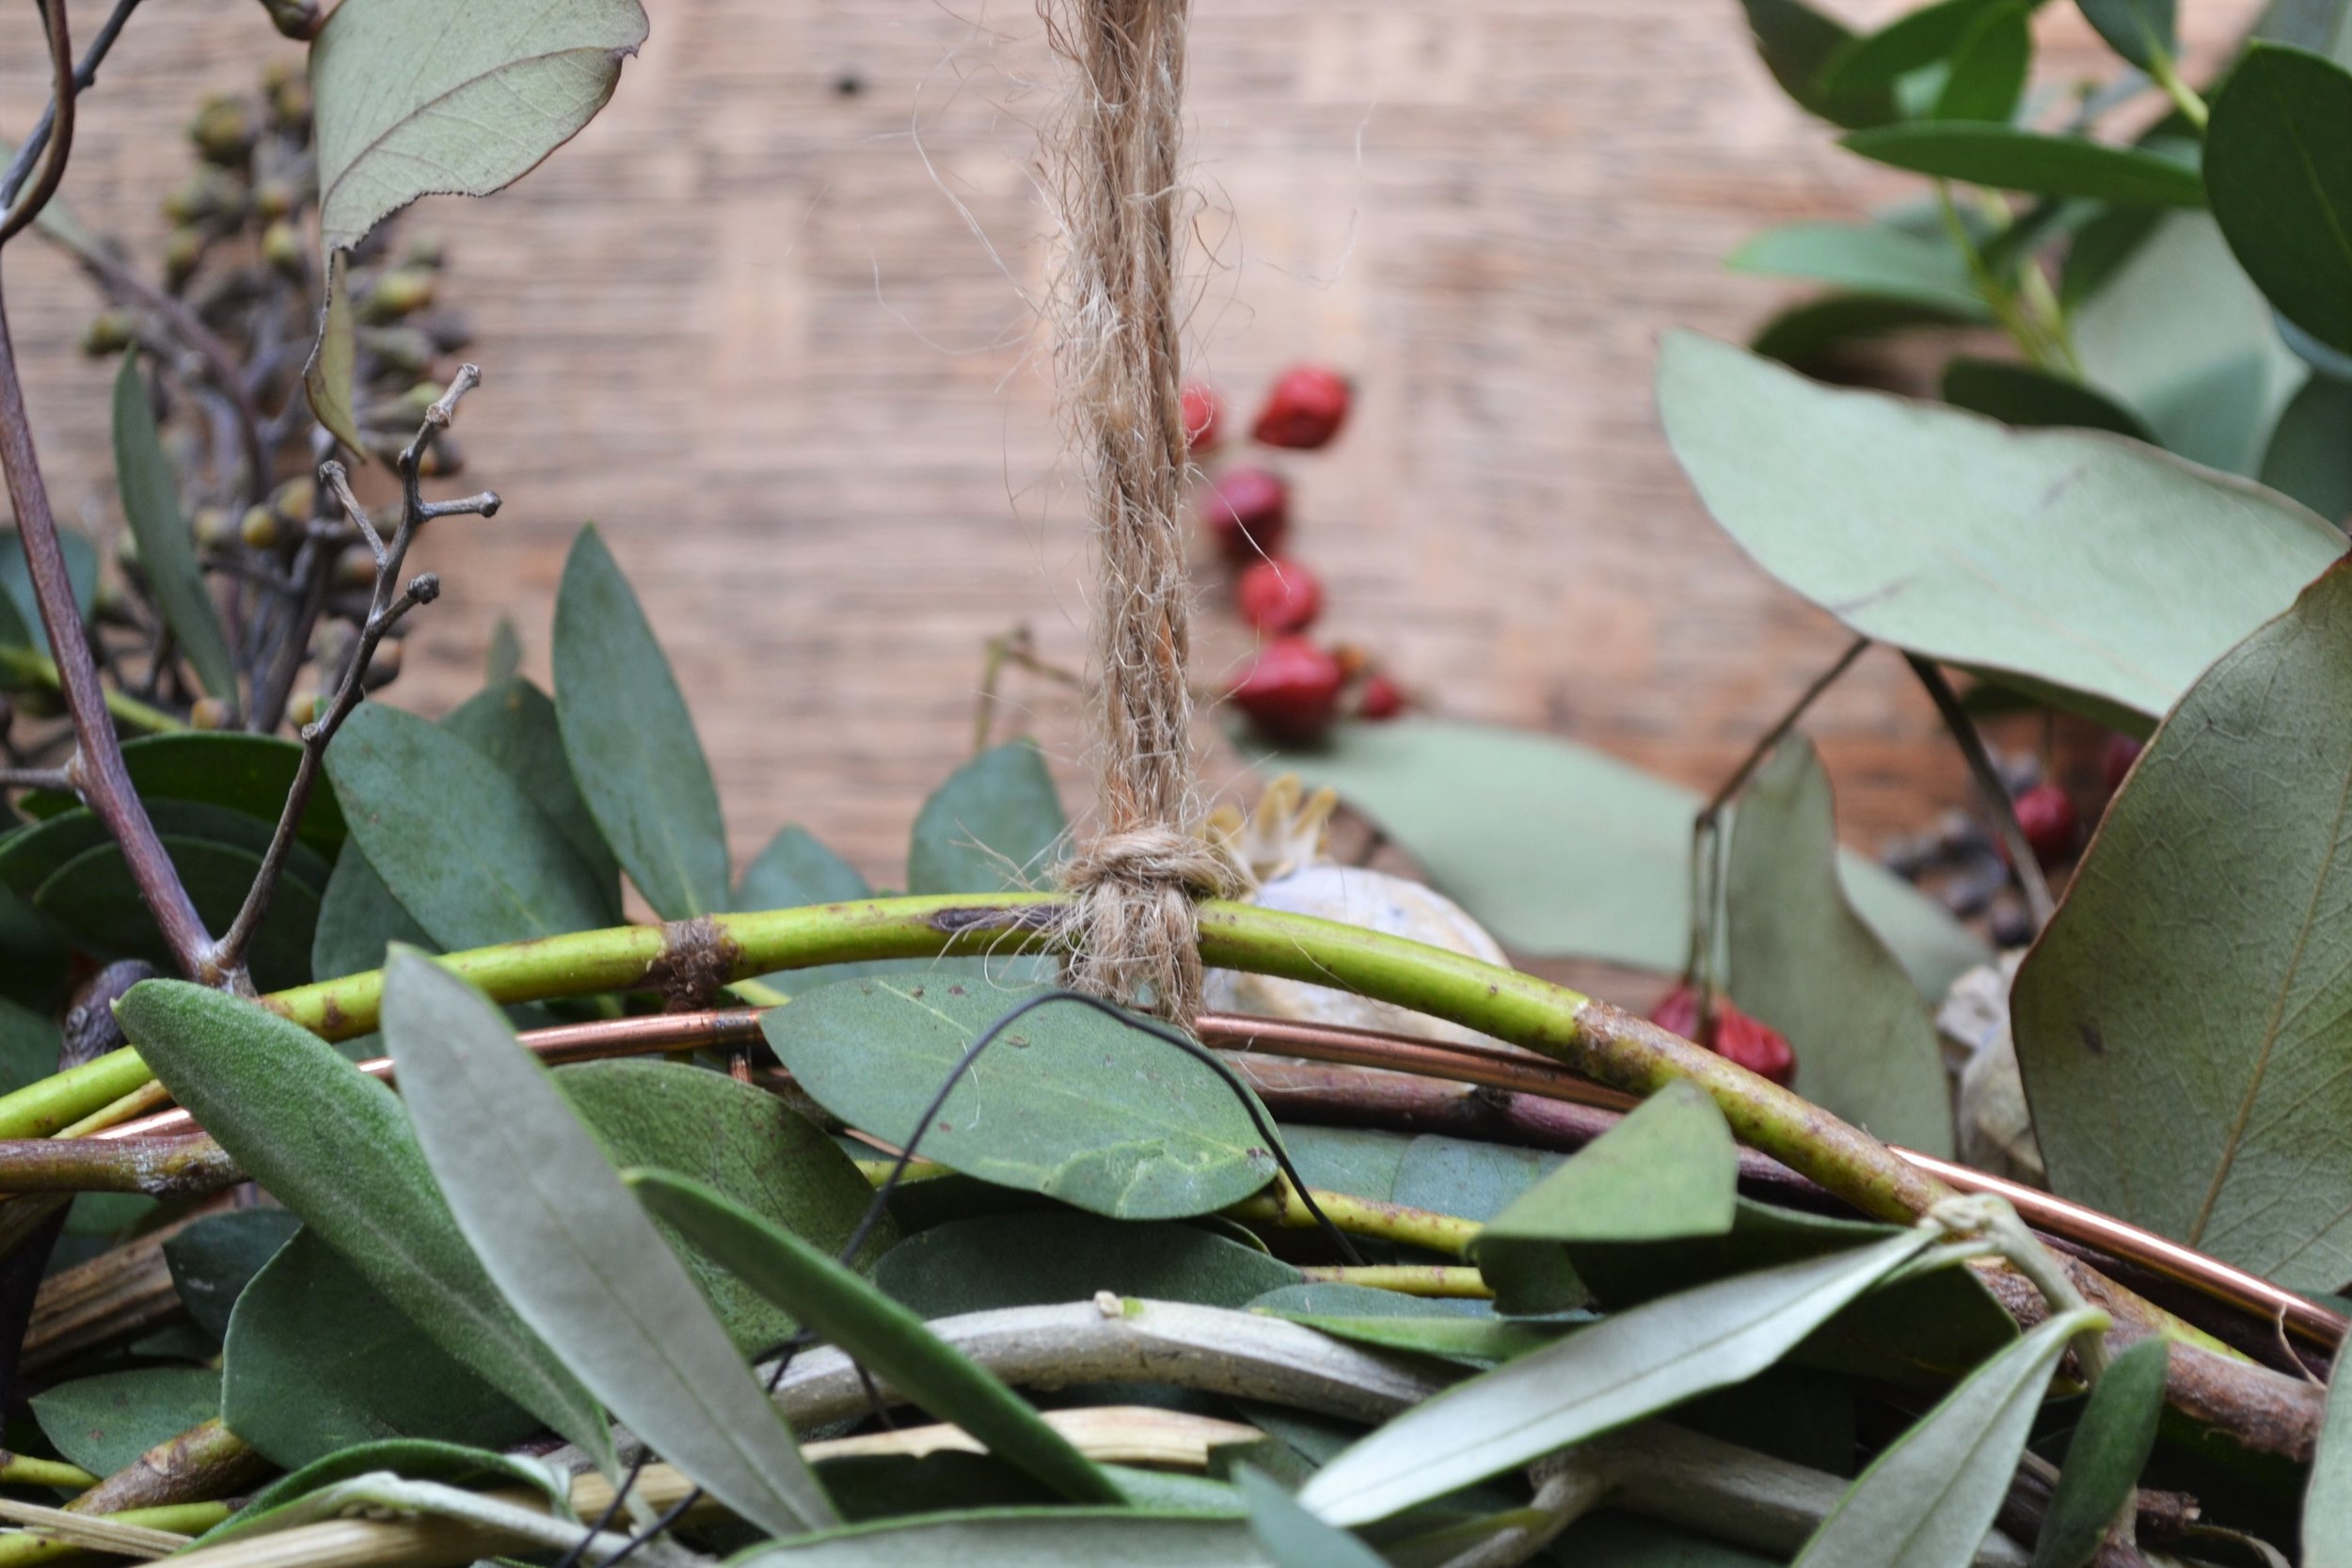
Step 1: Thread through the foliage stems. Keep the stems long so you can thread them around the wreath, keeping them secure. Build upon each stem as you go, intertwining the stems with the metal hoop and other stems. I haven’t used the reel wire here but you could if you wanted to make sure everything is very secure. My stem length was quite long so I felt confident they’d stay in place because I could intertwine them and wrap them around a lot.


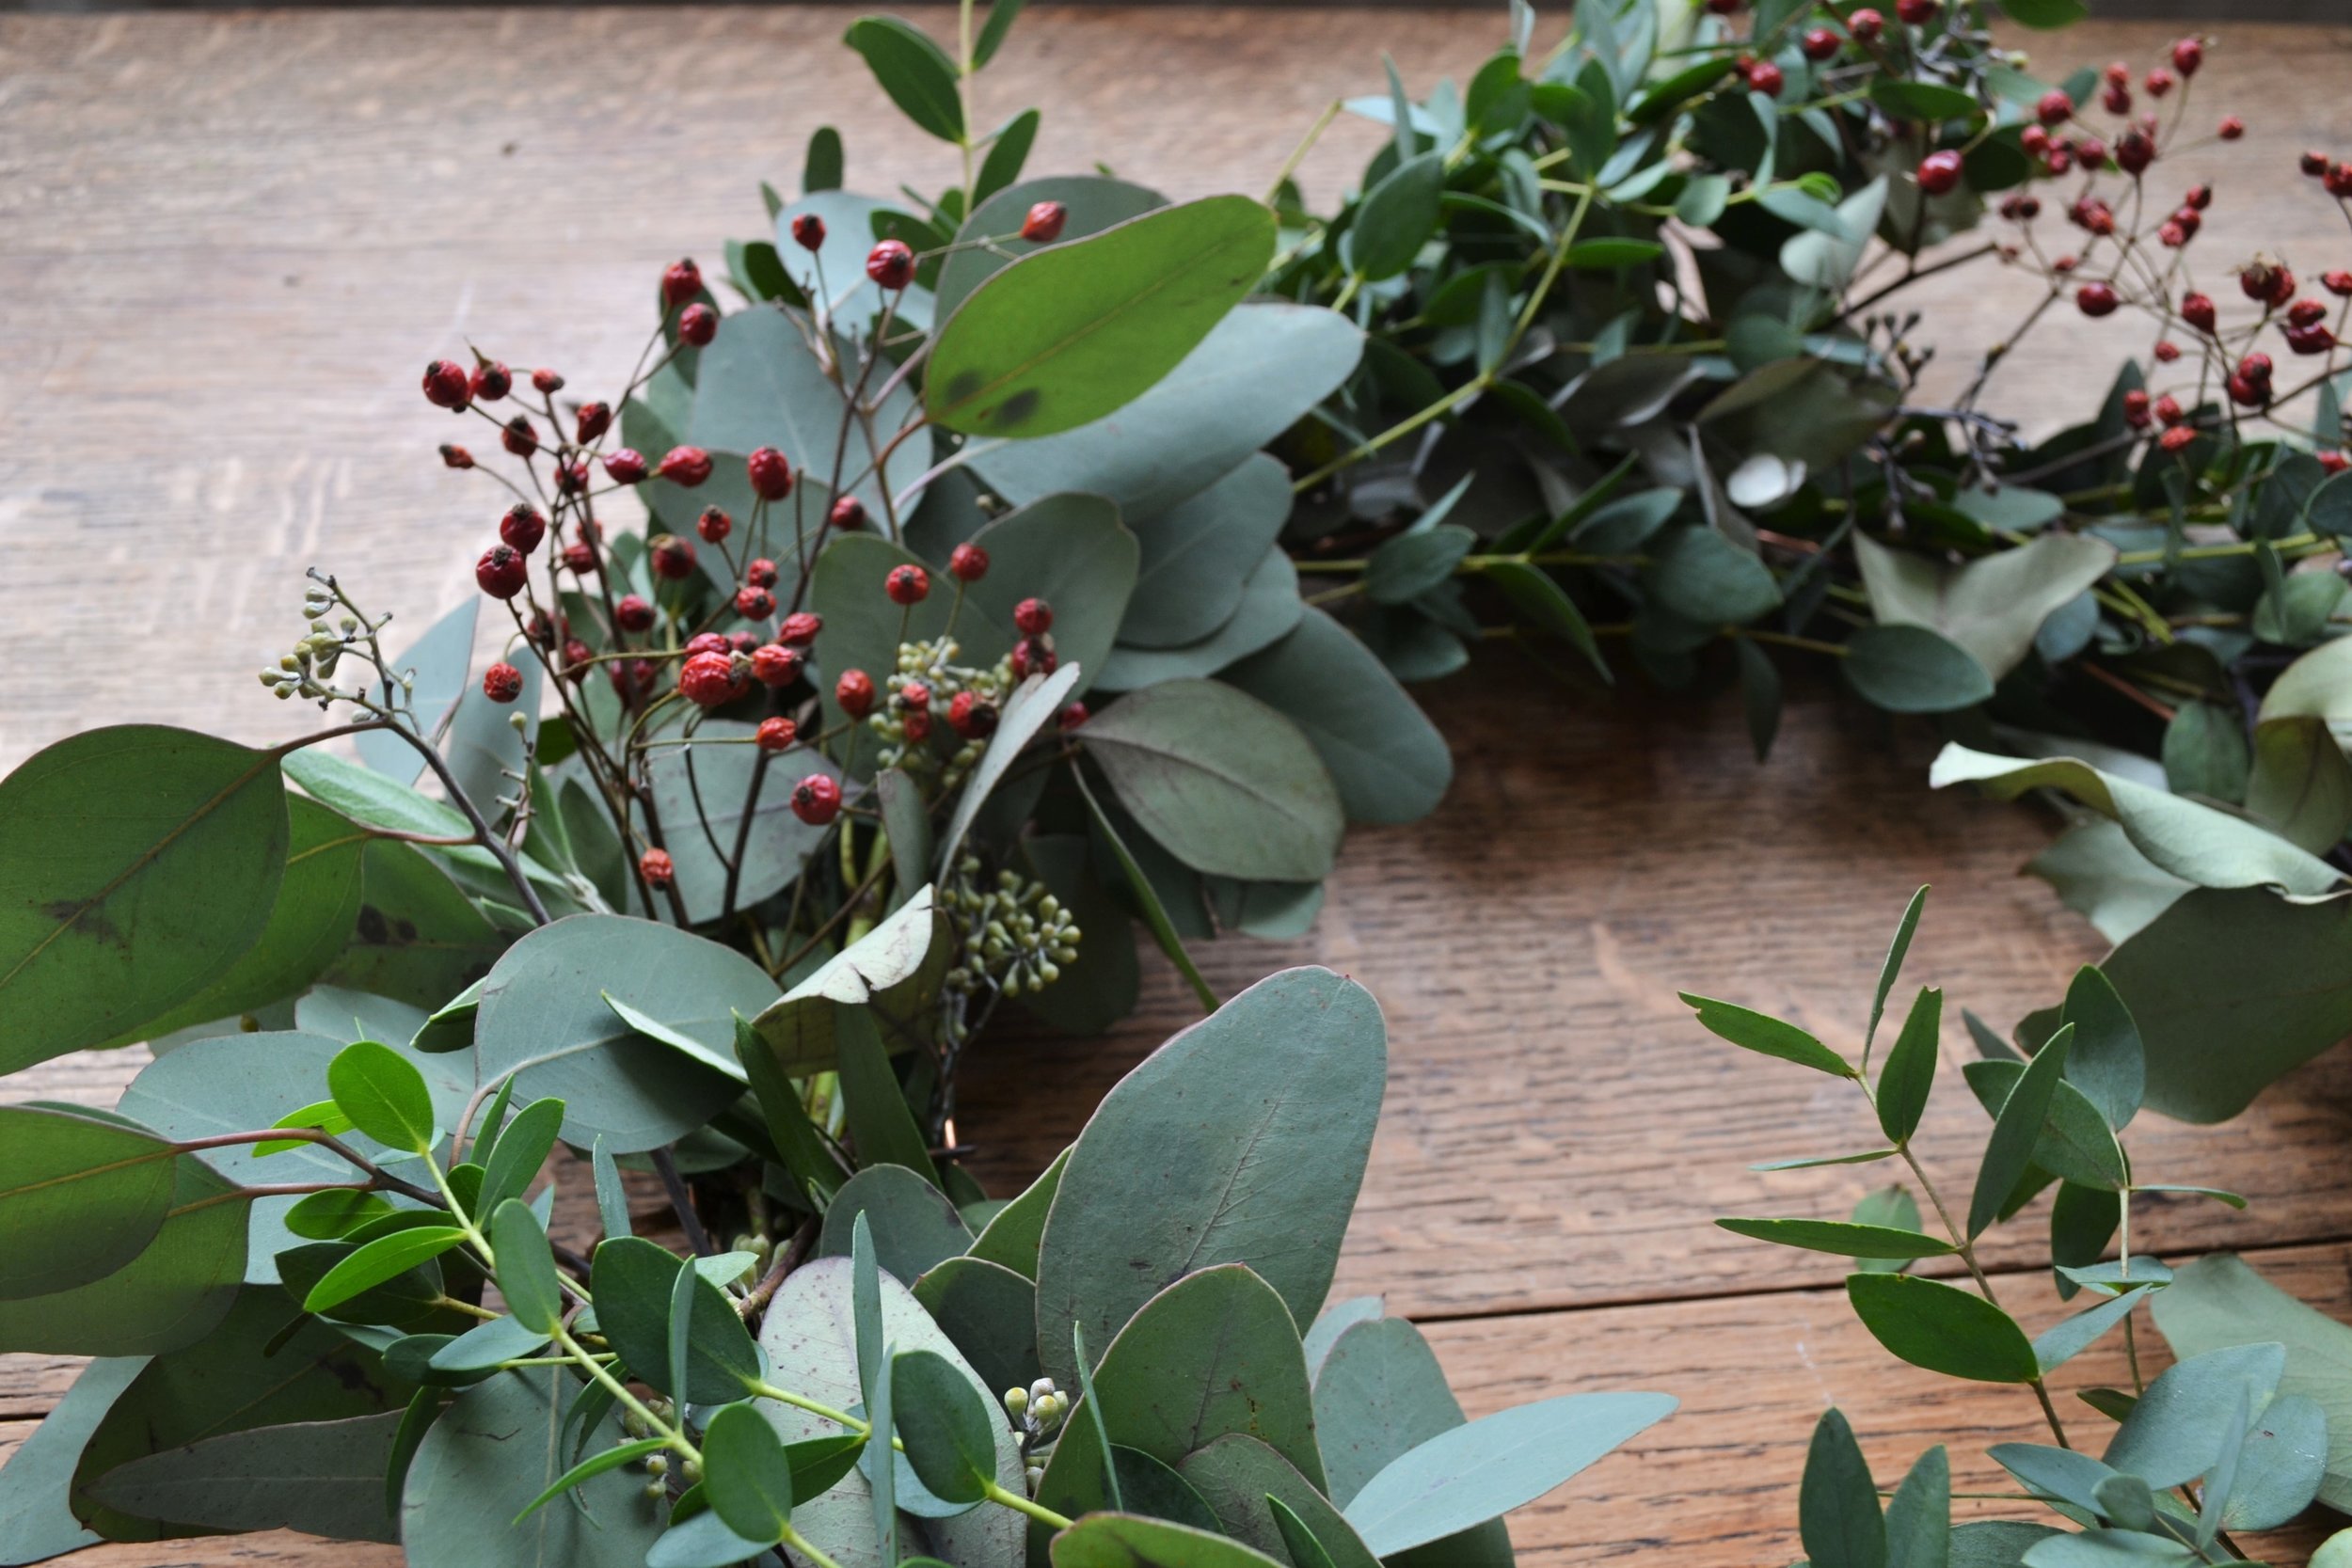
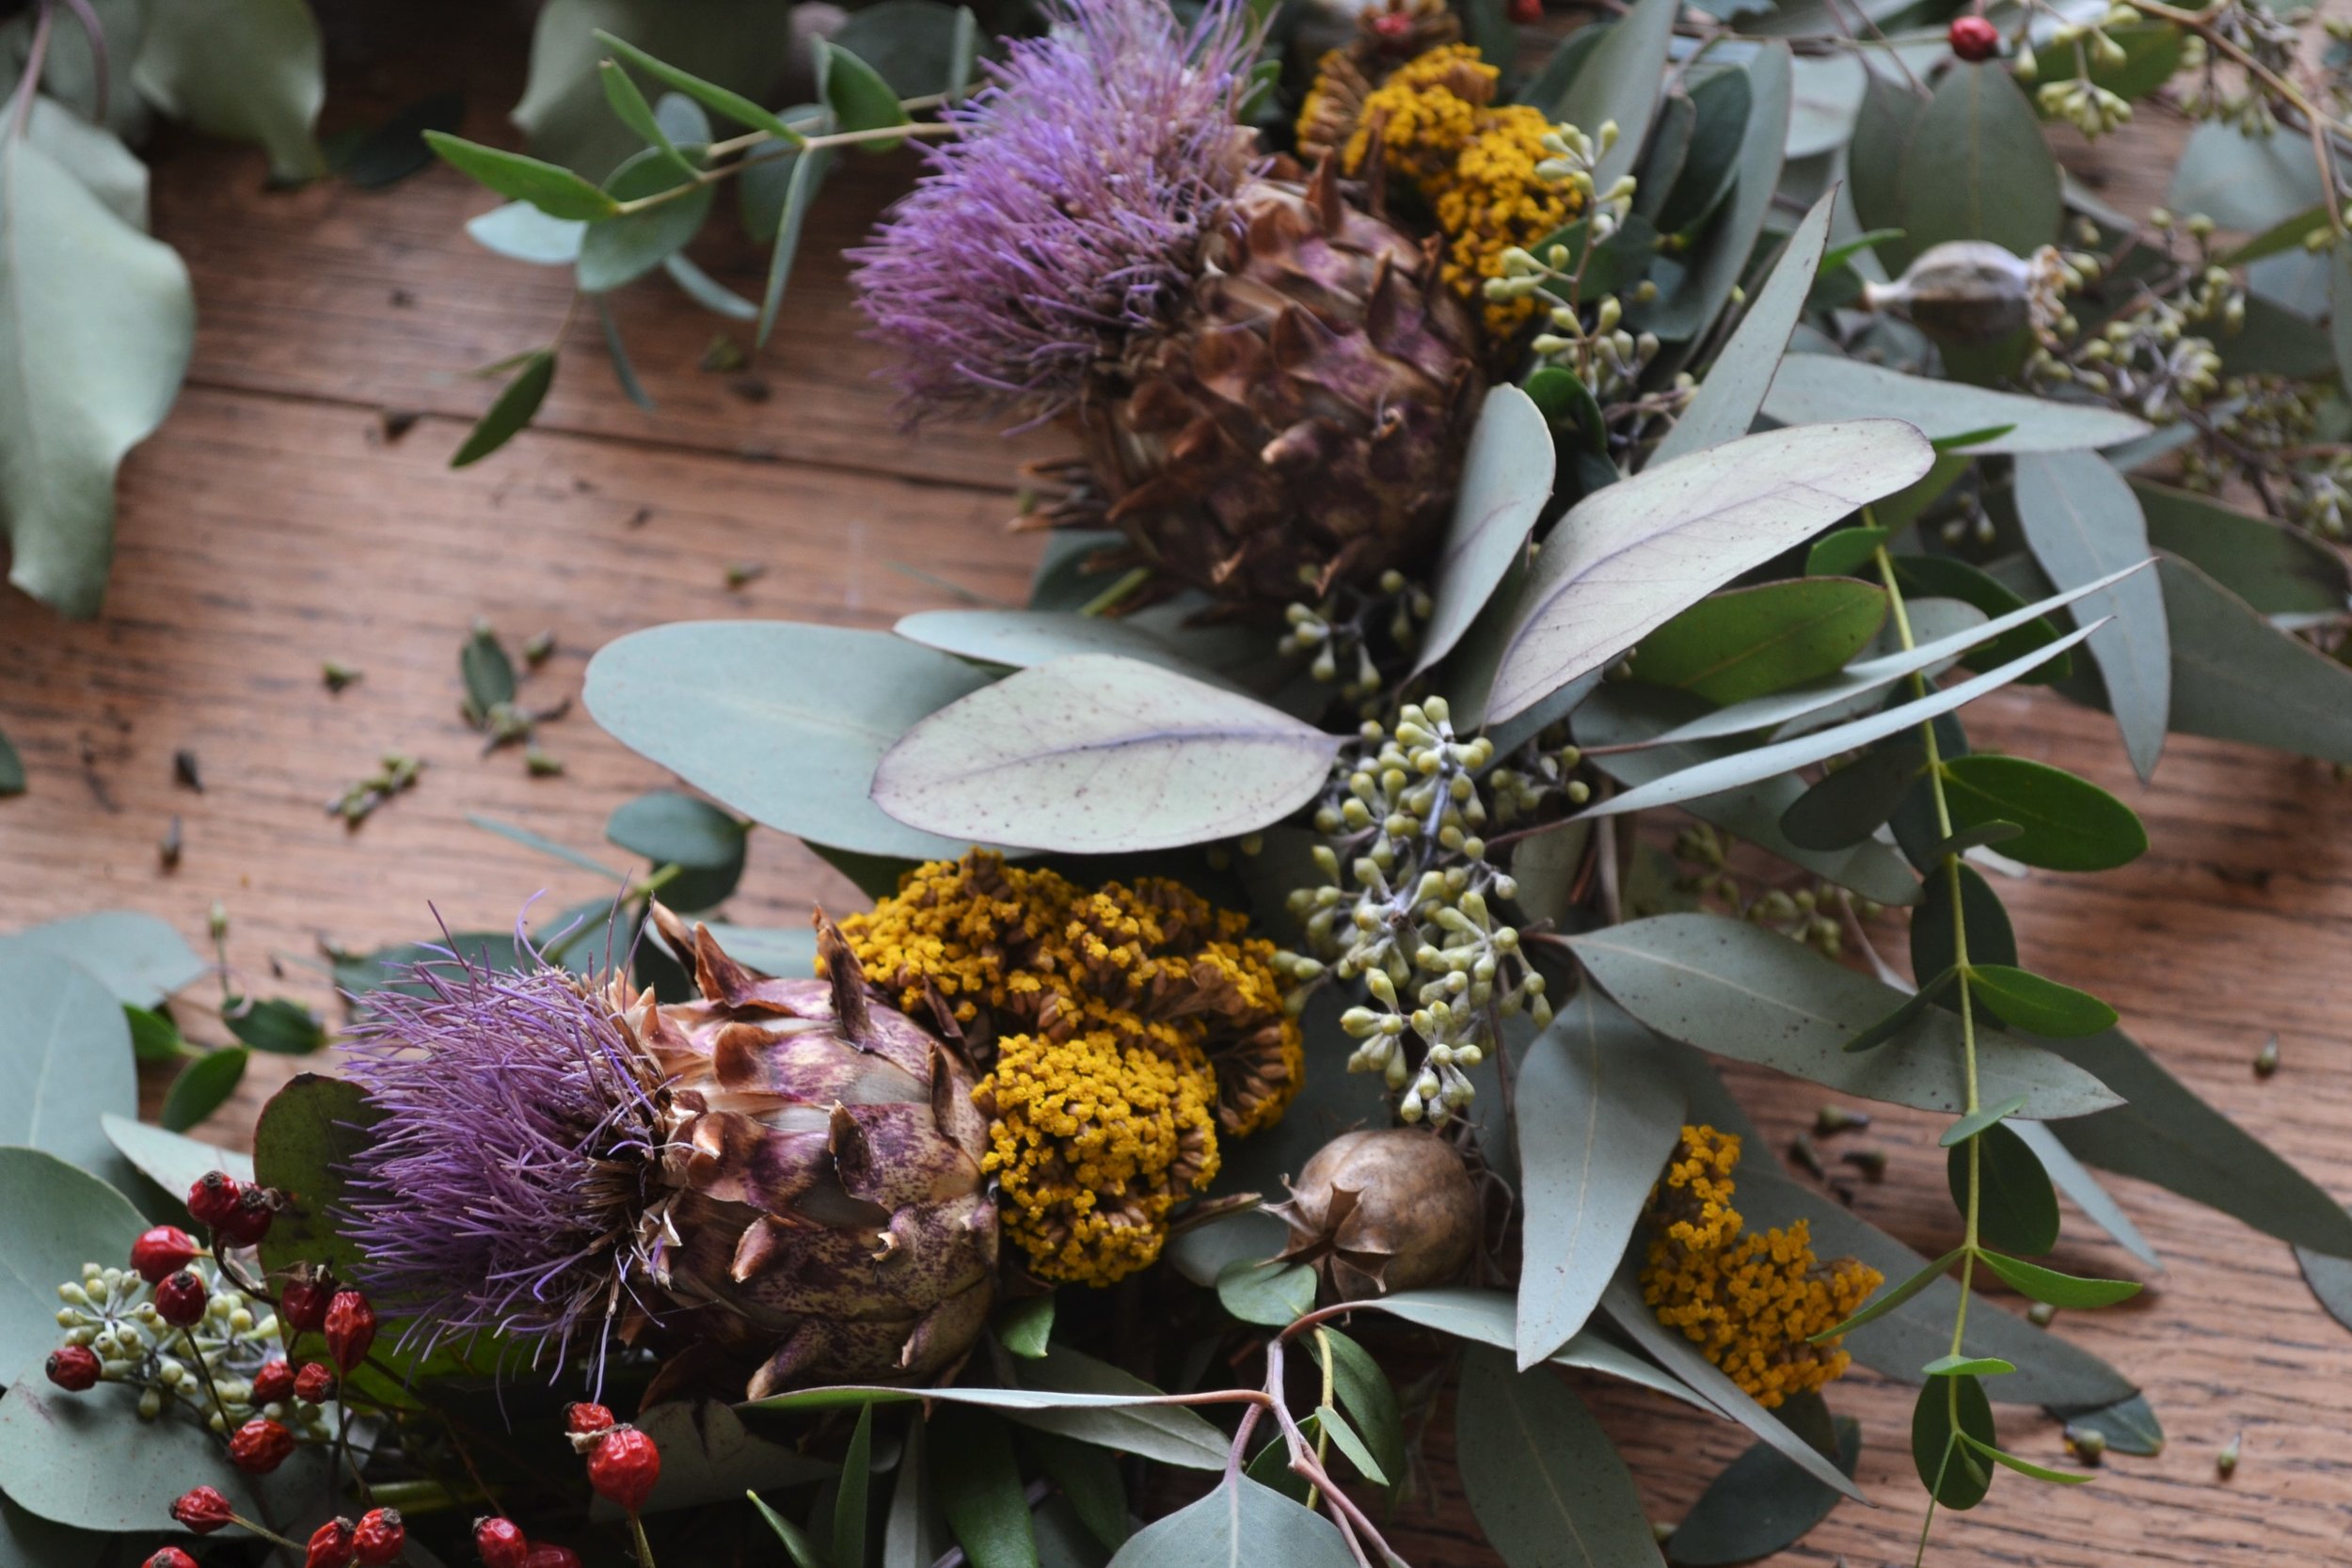
Step 2. Once all your foliage has been locked in, then you can start to add your dried seed heads and flowers. I started by adding texture using these little red rosehips. You can use your plant material quite sporadically (Clueless-style) when placing everything around the wreath. It doesn’t have to be too evenly spaced out if you love a natural and more wild look. I sometimes cluster and group things quite near each other because that adds an interesting rhythm to the wreath and makes it not too symmetrical in design. There’s something interesting to look at that changes all the way round the hoop. The back of your wreath will begin to build up with all your stems twisting and wrapping in the same direction.
Step 3. Now you can add in your larger and bulkier flowers or seed heads. Here I’ve dried out artichoke heads from my Mum’s allotment and the stems were still long so I threaded them into the mass of stems and copper hoop. I put these two larger shapes to the left and bottom left of the wreath because they look more natural there and draw the eye downwards.

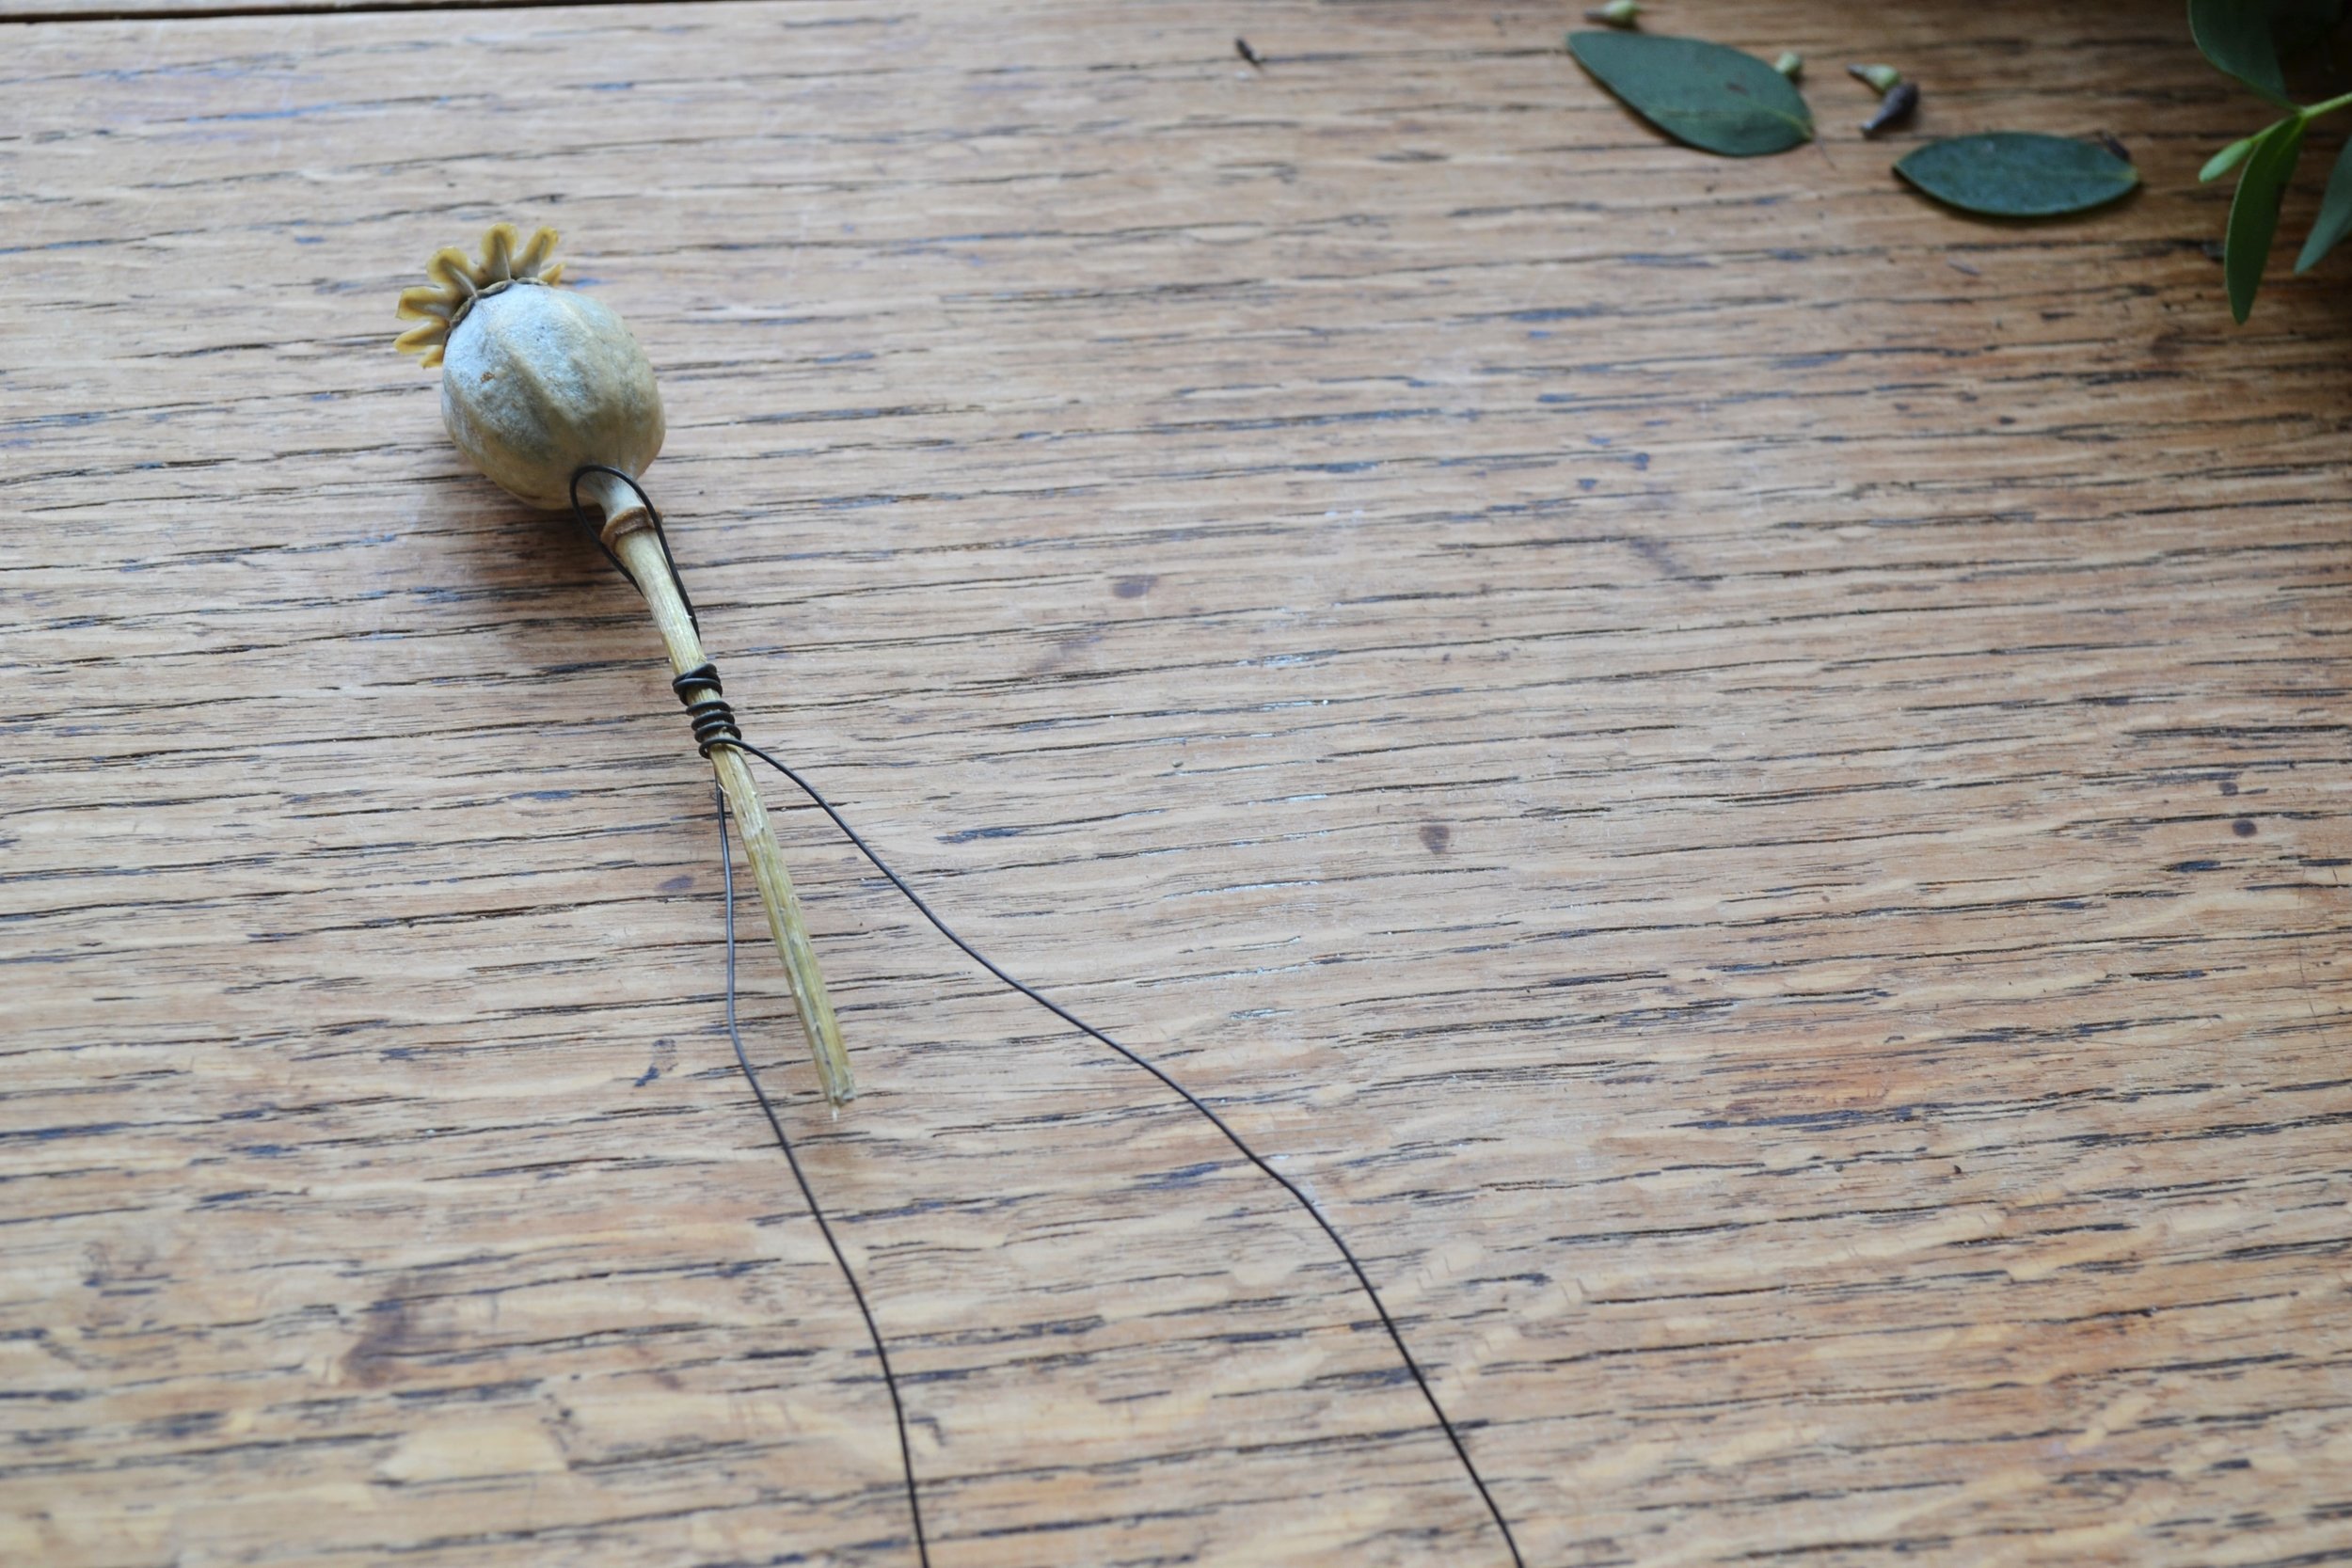
Step 4. If you’ve found some shorter seed heads or dried flowers that don’t have a long enough stem to thread through into the wreath, you can wire them. With this poppy stem, I’ve strengthened and lengthened the stem by folding down the reel wire in two and then wrapping one of the wires around the stem and the opposite length of wire to secure it in place. This is now a lot easier to thread into the wreath and secure with a couple of twists at the back. Push any of the ends of the wire back into the wreath so they don’t scratch your wall or door. With the nigella on the right below here, the seed head case was thin enough for me to pierce through with the wire and then twist in place down the stem.

Step 5. Keep adding texture and colour into your wreath. Nestling items down in between the leaves adds depth to the wreath and draws your eye in to look at all the details. You can go wild and have some of the flowers, leaves and rosehips extending outwards to break up the neatness of the circle shape.

Step 6. Add a piece of twine at the top of your wreath ring so you can hang up your Autumn wreath proudly on your front door. My wreath’s currently hanging in the hallway to distract from the coats, and keys and letters that pile up on the sideboard.

Depending on the look you’d like to achieve, you can keep your wreath wild and leafy or go for a neat look and tuck the leaves in and trim off anything that’s gone awol. As long as all of the stems are thread through in the same direction, your wreath will naturally form a circular look.
I can’t wait to see what you make! Let me know how you get on with your door wreath and tag me @WebbandFarrer in your Instagram photos. If you’ve also got any questions then please give me a shout here.


Flower Workshops online so you can learn at home
Get confident with arranging fresh flowers and follow the steps at your own pace.