
Make a Mini Dried Floral Hoop
Do you love dried flowers and have vases of them in your home in amongst your books and houseplants? To elevate your dried flower styling game even further, here’s a simple tutorial for you to create a mini dried floral hoop to hang up on the wall at home.
These hoops also look really pretty decorating a wedding venue and can be tied to chairs down the aisle too. Use dried flowers that reflect the look of your wedding colour palette and make these in advance so you’ve got less to do and make as you get nearer to your wedding day.

These handmade floral hoops add a nod to the seasons when they're hanging on the wall amongst picture frames, and they also look cute on a door and tied to the handle of a chest of drawers. Dried flowers can also be fragrant so use your scented favourites in your hoop to reflect the rest of your styling at home and bring floral scents indoors. If you’ve got soft pinks and greys at home you could use dried rose buds with dried eucalyptus leaves for your hoop. For a more vibrant decor colour palette, yellow craspedia and colourful straw flowers are great dried flower options.
Some flowers and grasses can drop slightly over time, so make sure to display the hoop you make away from children and pets.
Below is the DIY flower tutorial showing you how to make a your mini dried floral hoop…
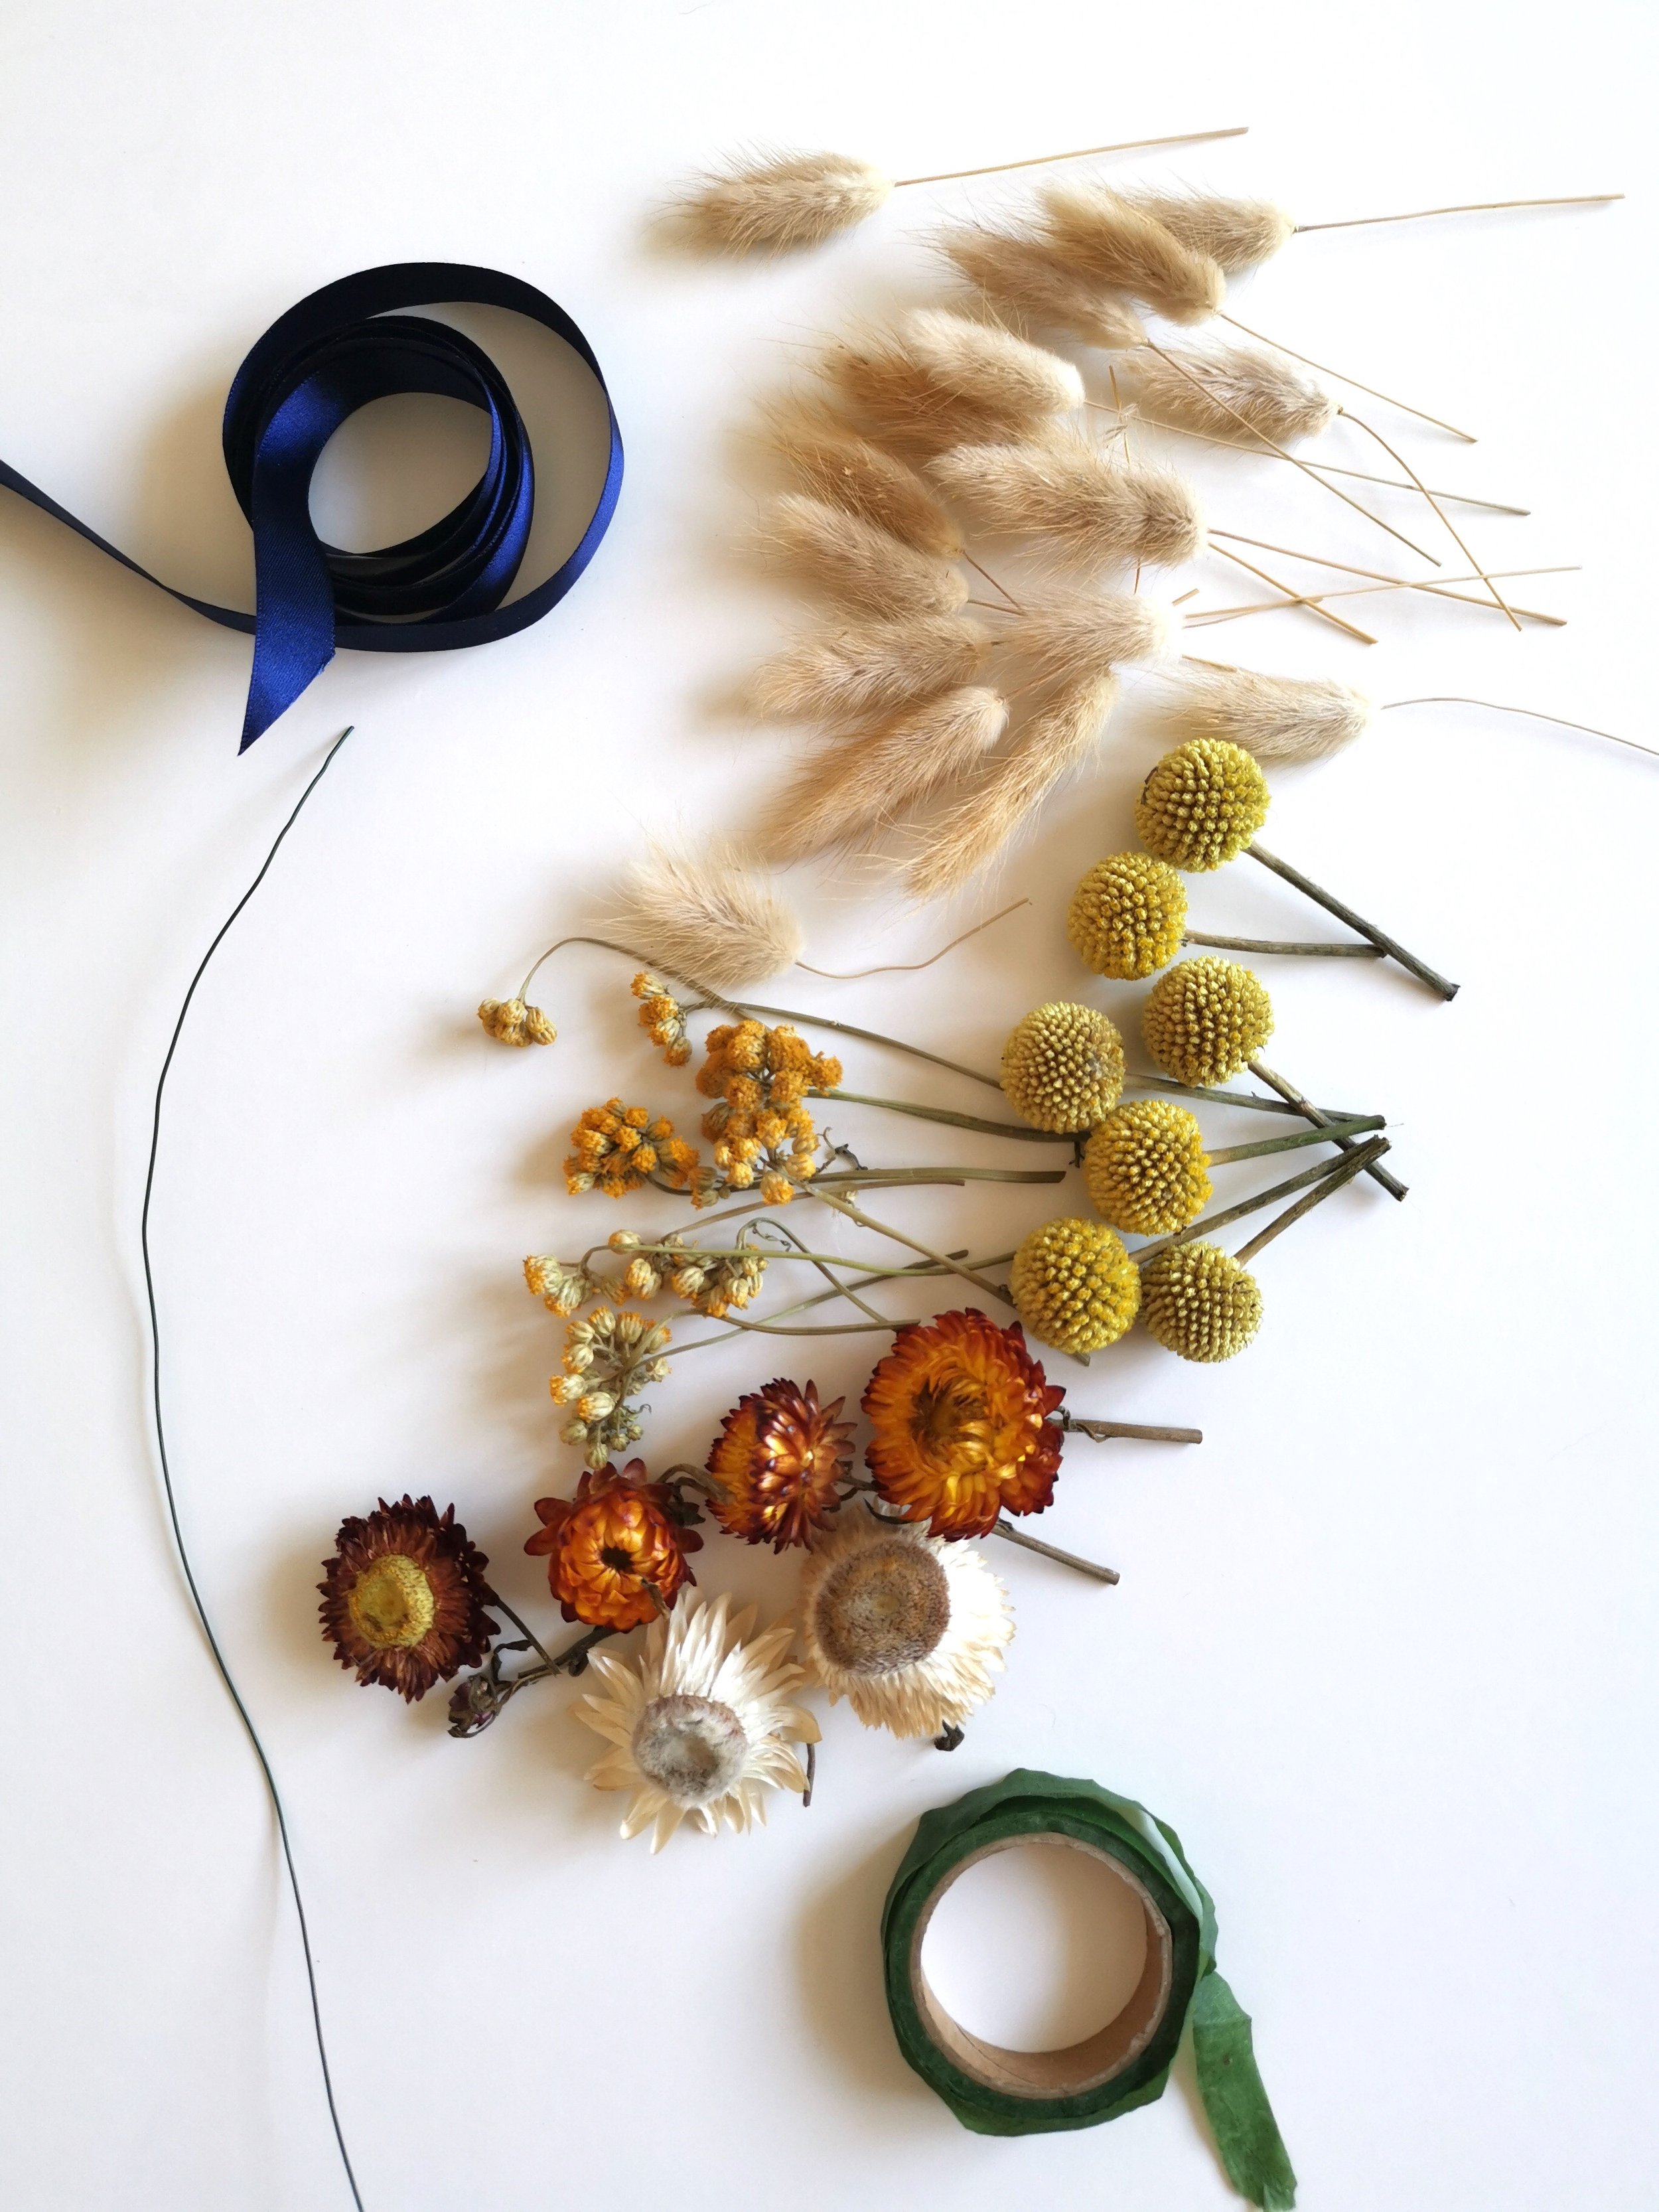
You will need:
Thick wire
Parafilm stem tape
Dried Grass (I used bunny tail)
Dried Flowers (I used ageratum, craspedia and strawflowers)
Ribbon
How to Make your Mini Dried Floral Hoop
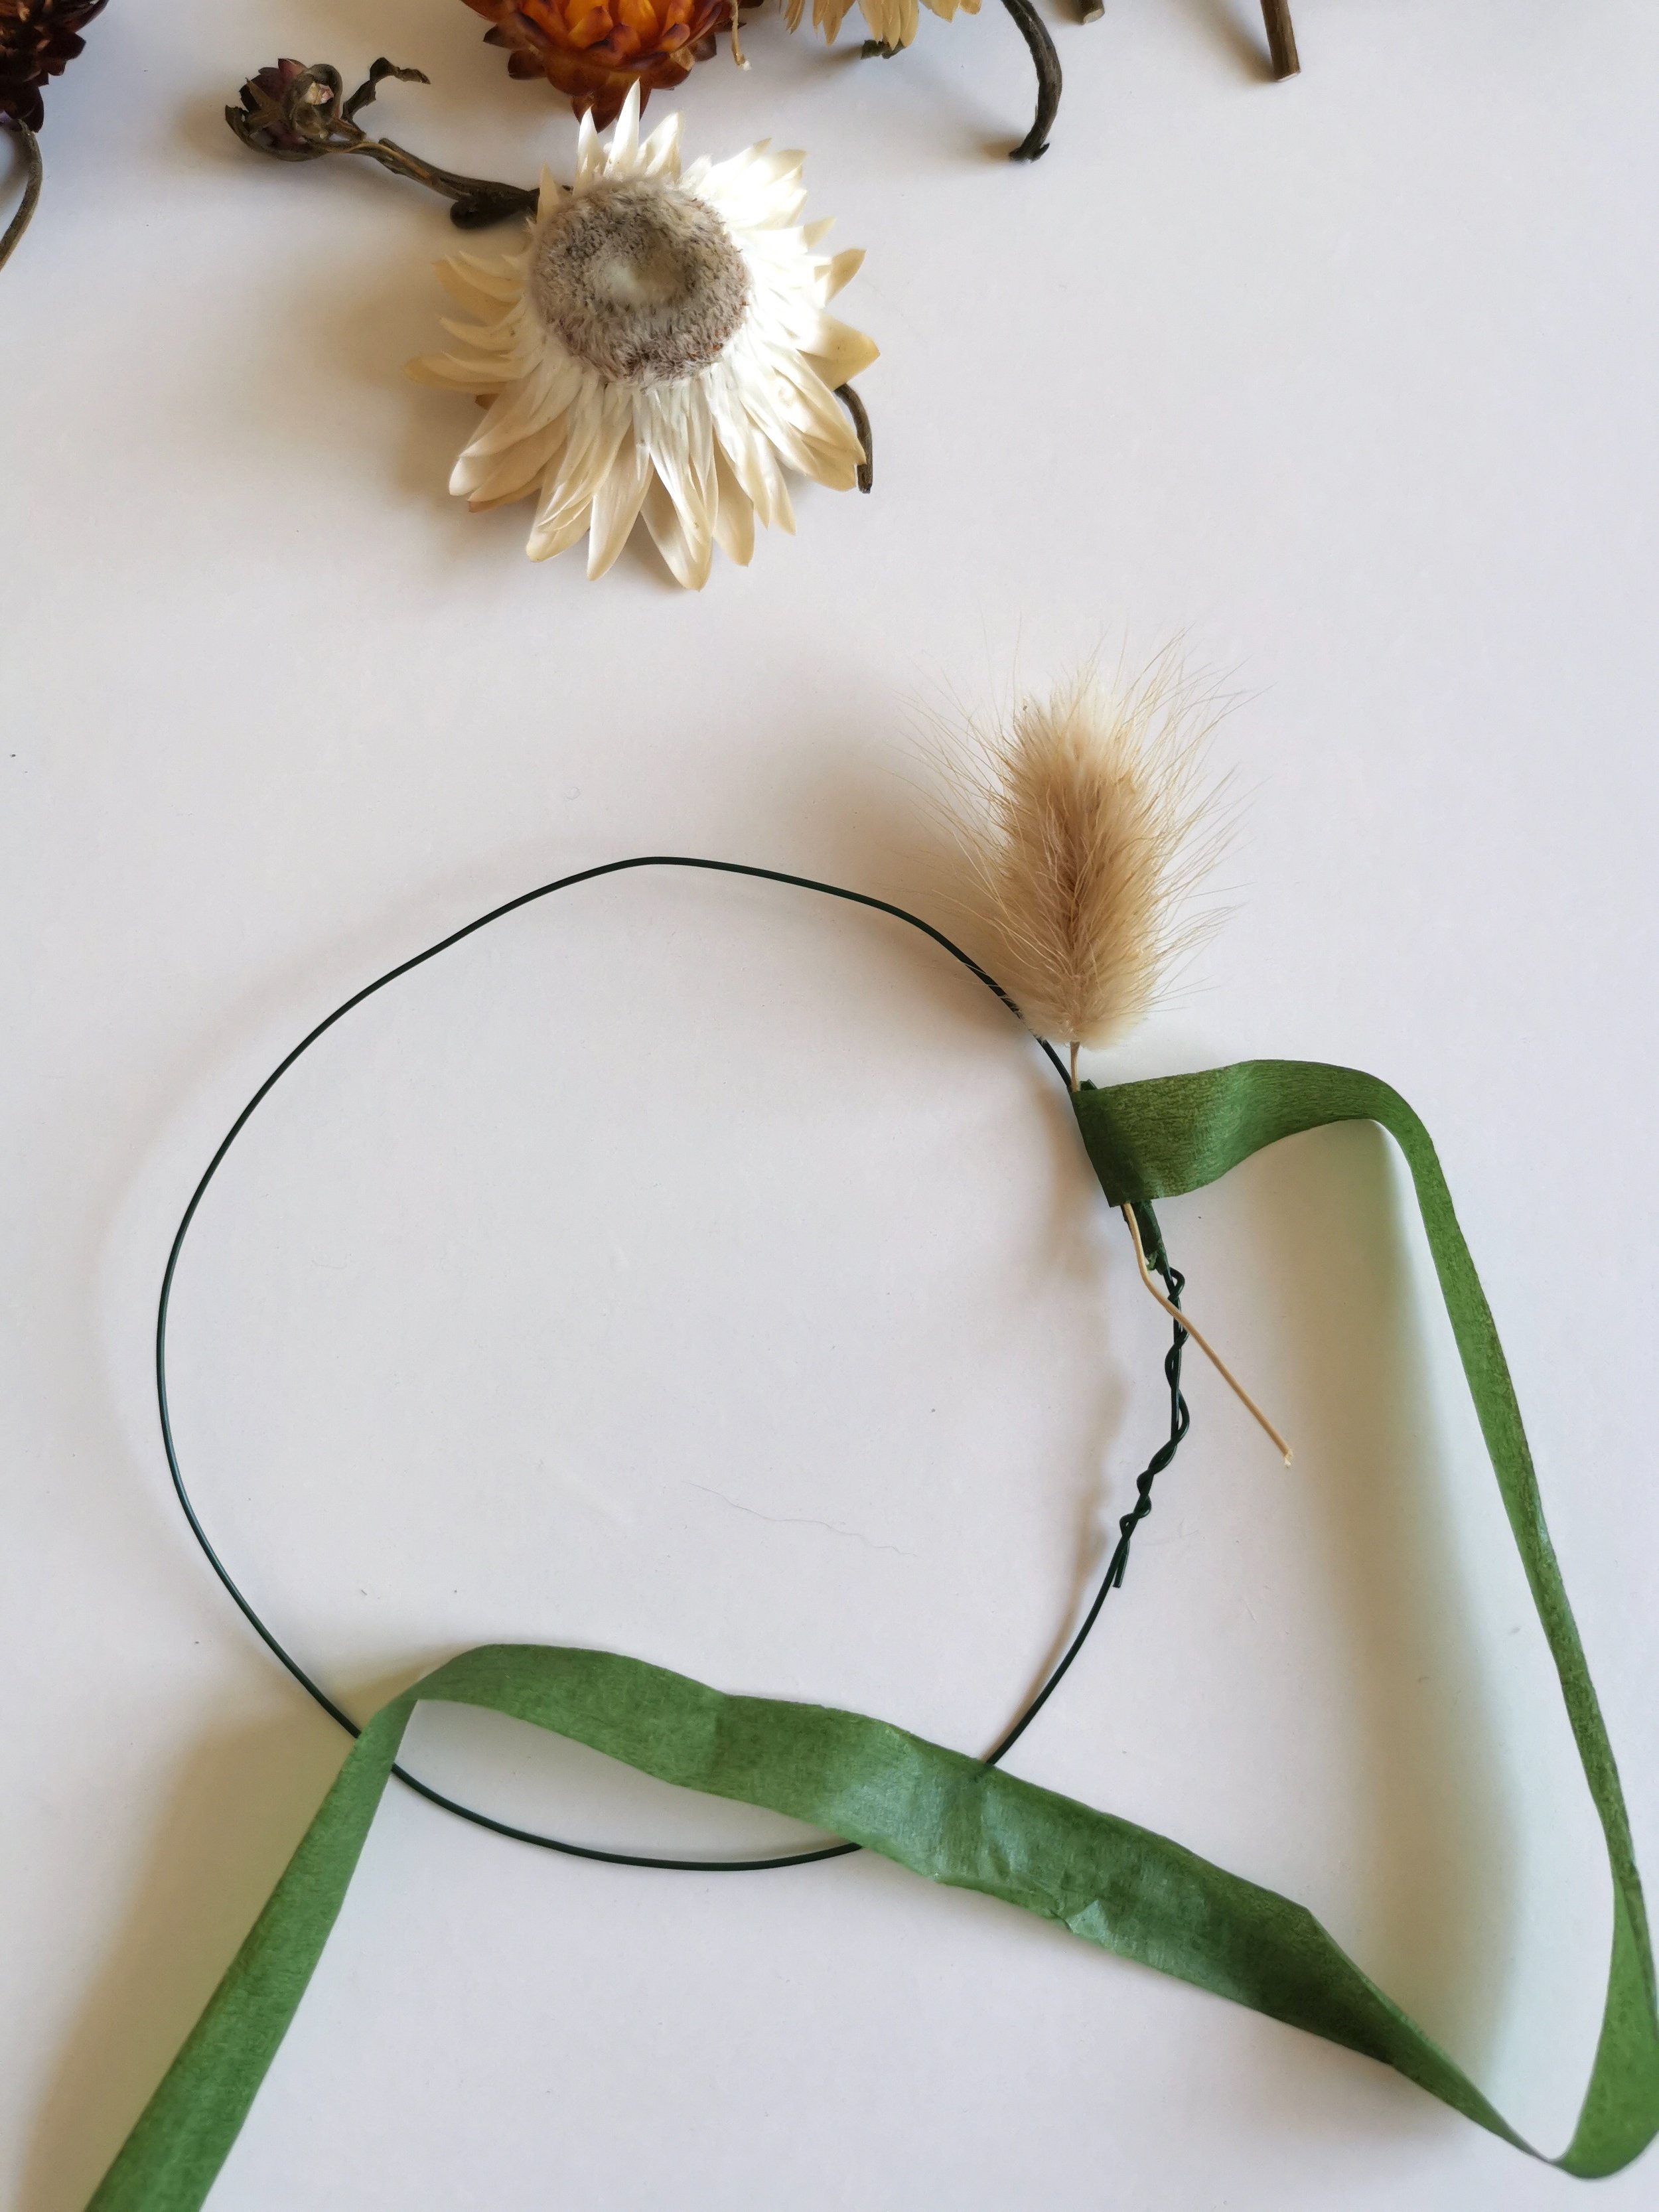
Step 1. Make your hoop shape with the wire by twisting it together to form a circle.
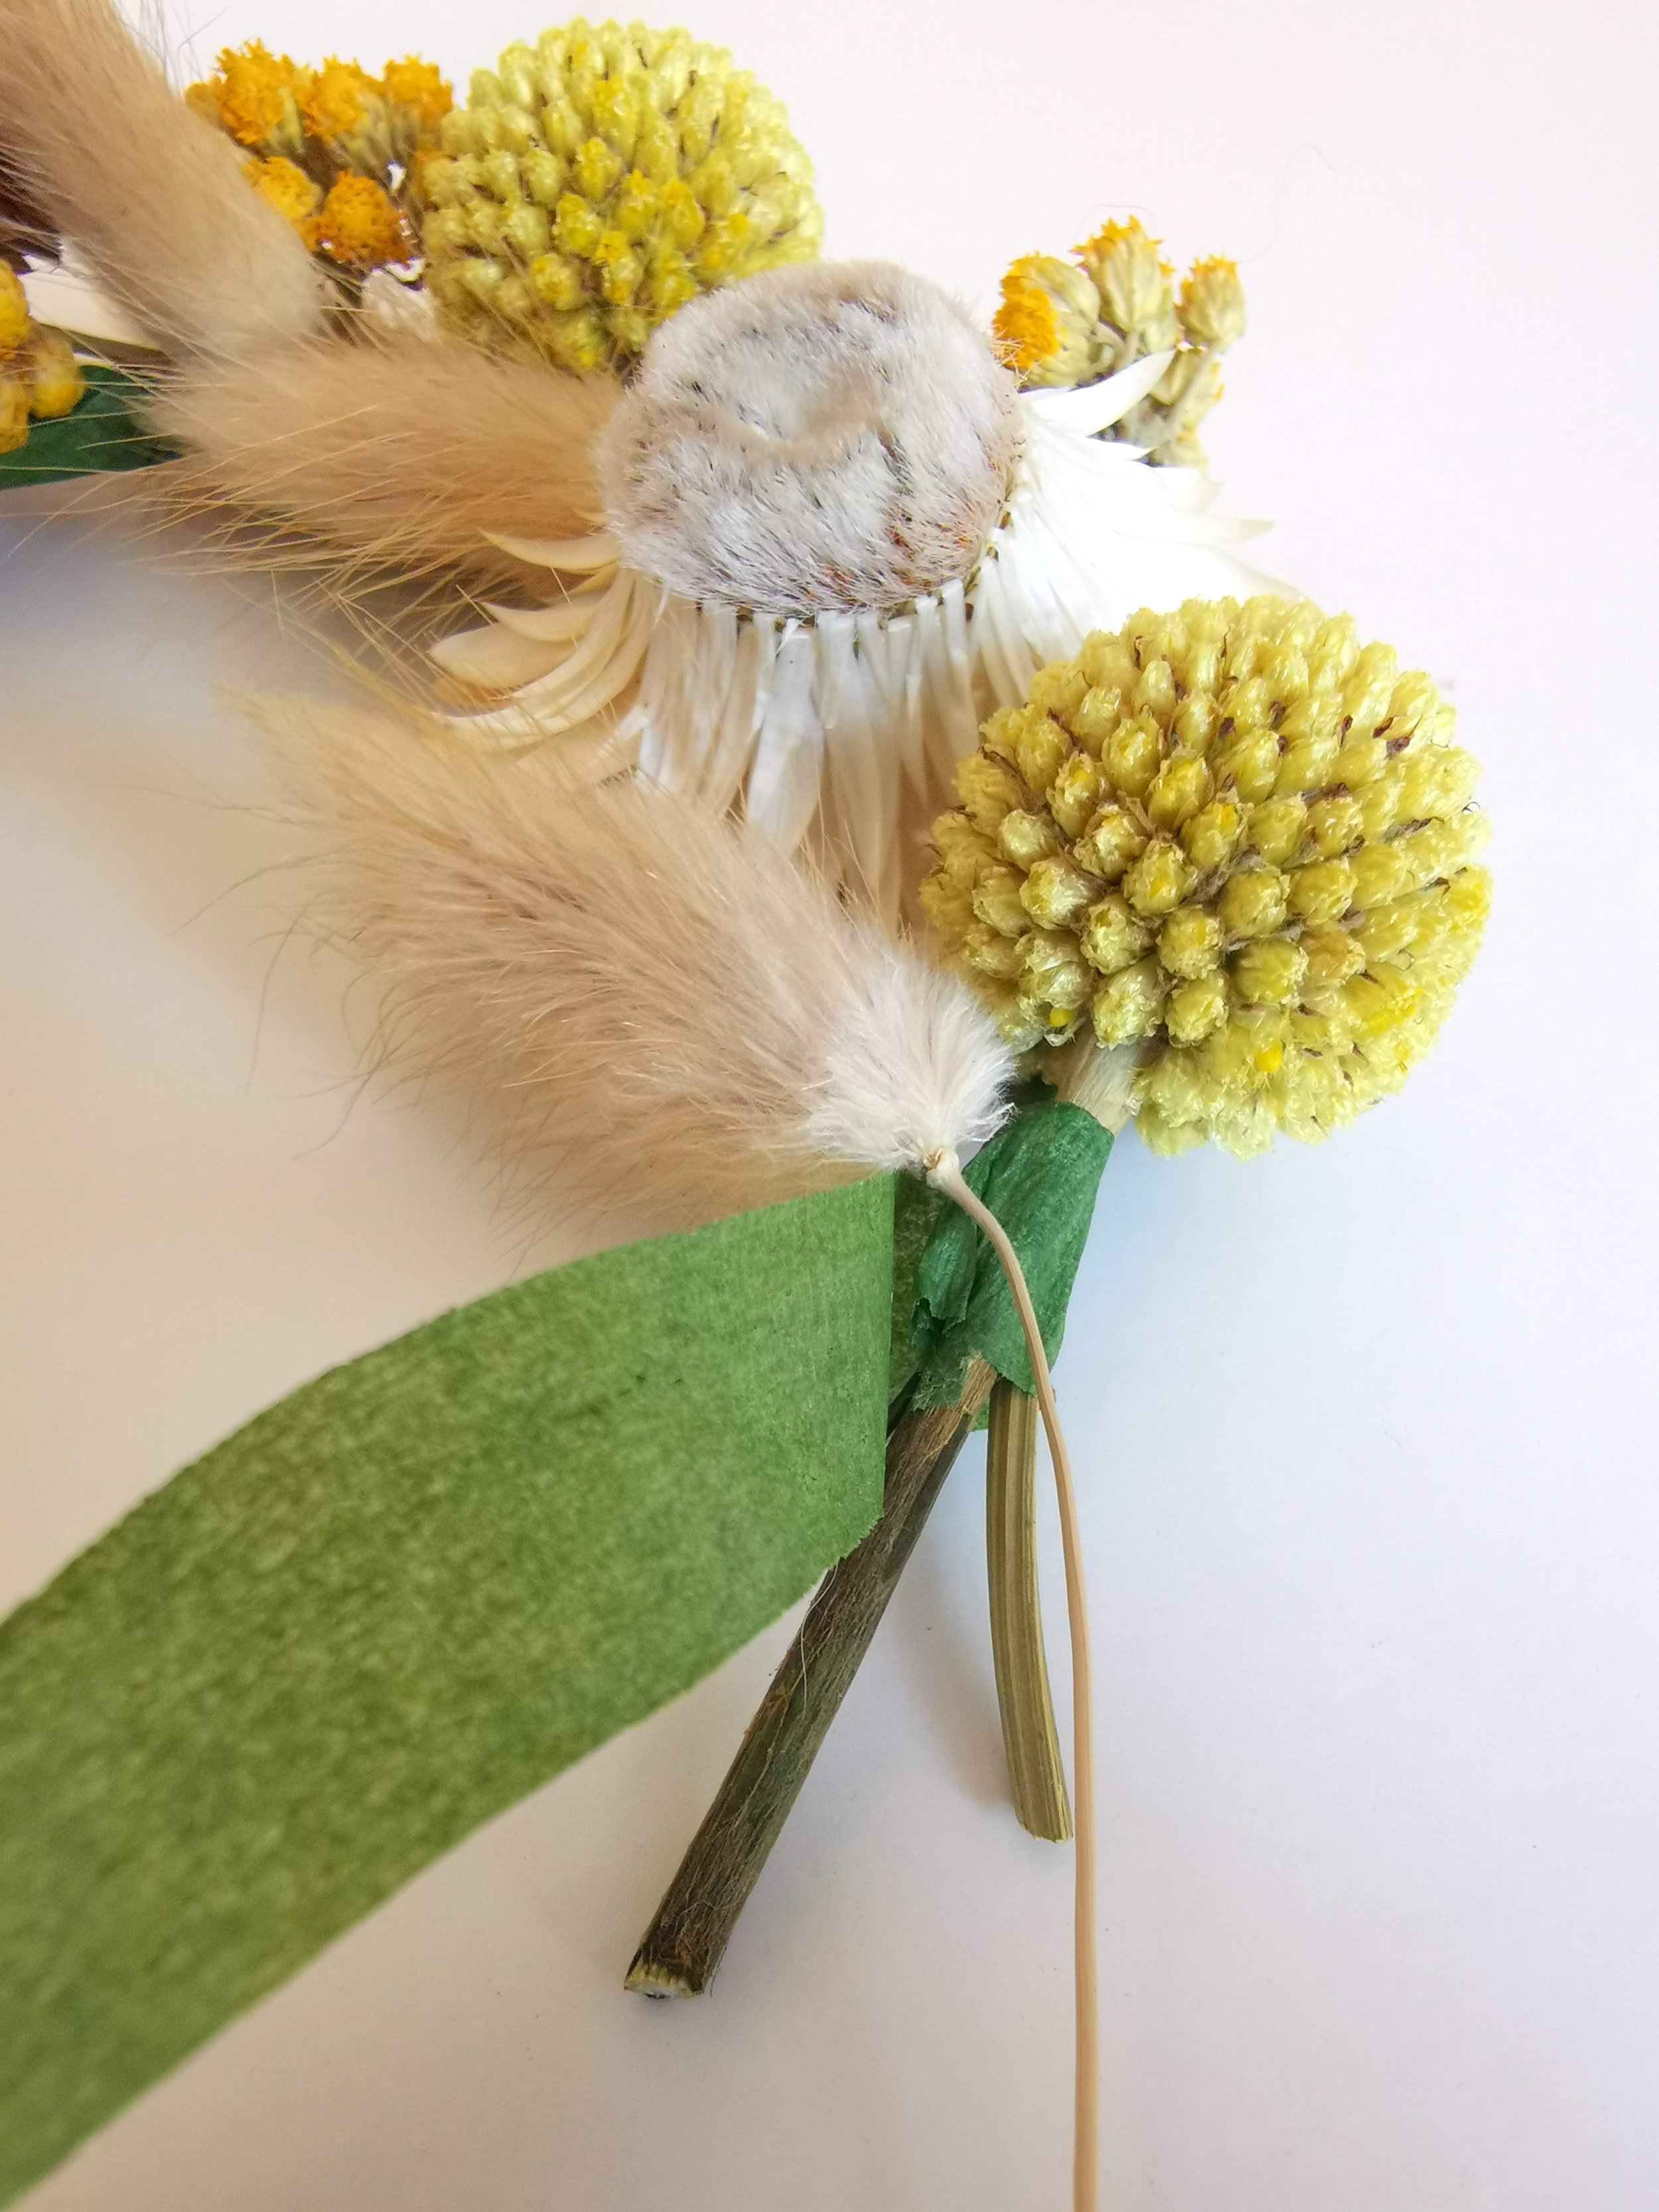
Step 2. Attach your stem tape onto the wire. Stem tape becomes sticky when it's stretched. Wrap it round the wire and press it on firmly to stick it to your hoop.
Step 3. If you'd like to preplan your design you can lay out your flowers and grasses in the order you'd like them to go in before you get started. Lay your first piece of grass onto the hoop and tape it on tightly by wrapping the tape around the stem a couple of times and pressing down firmly.

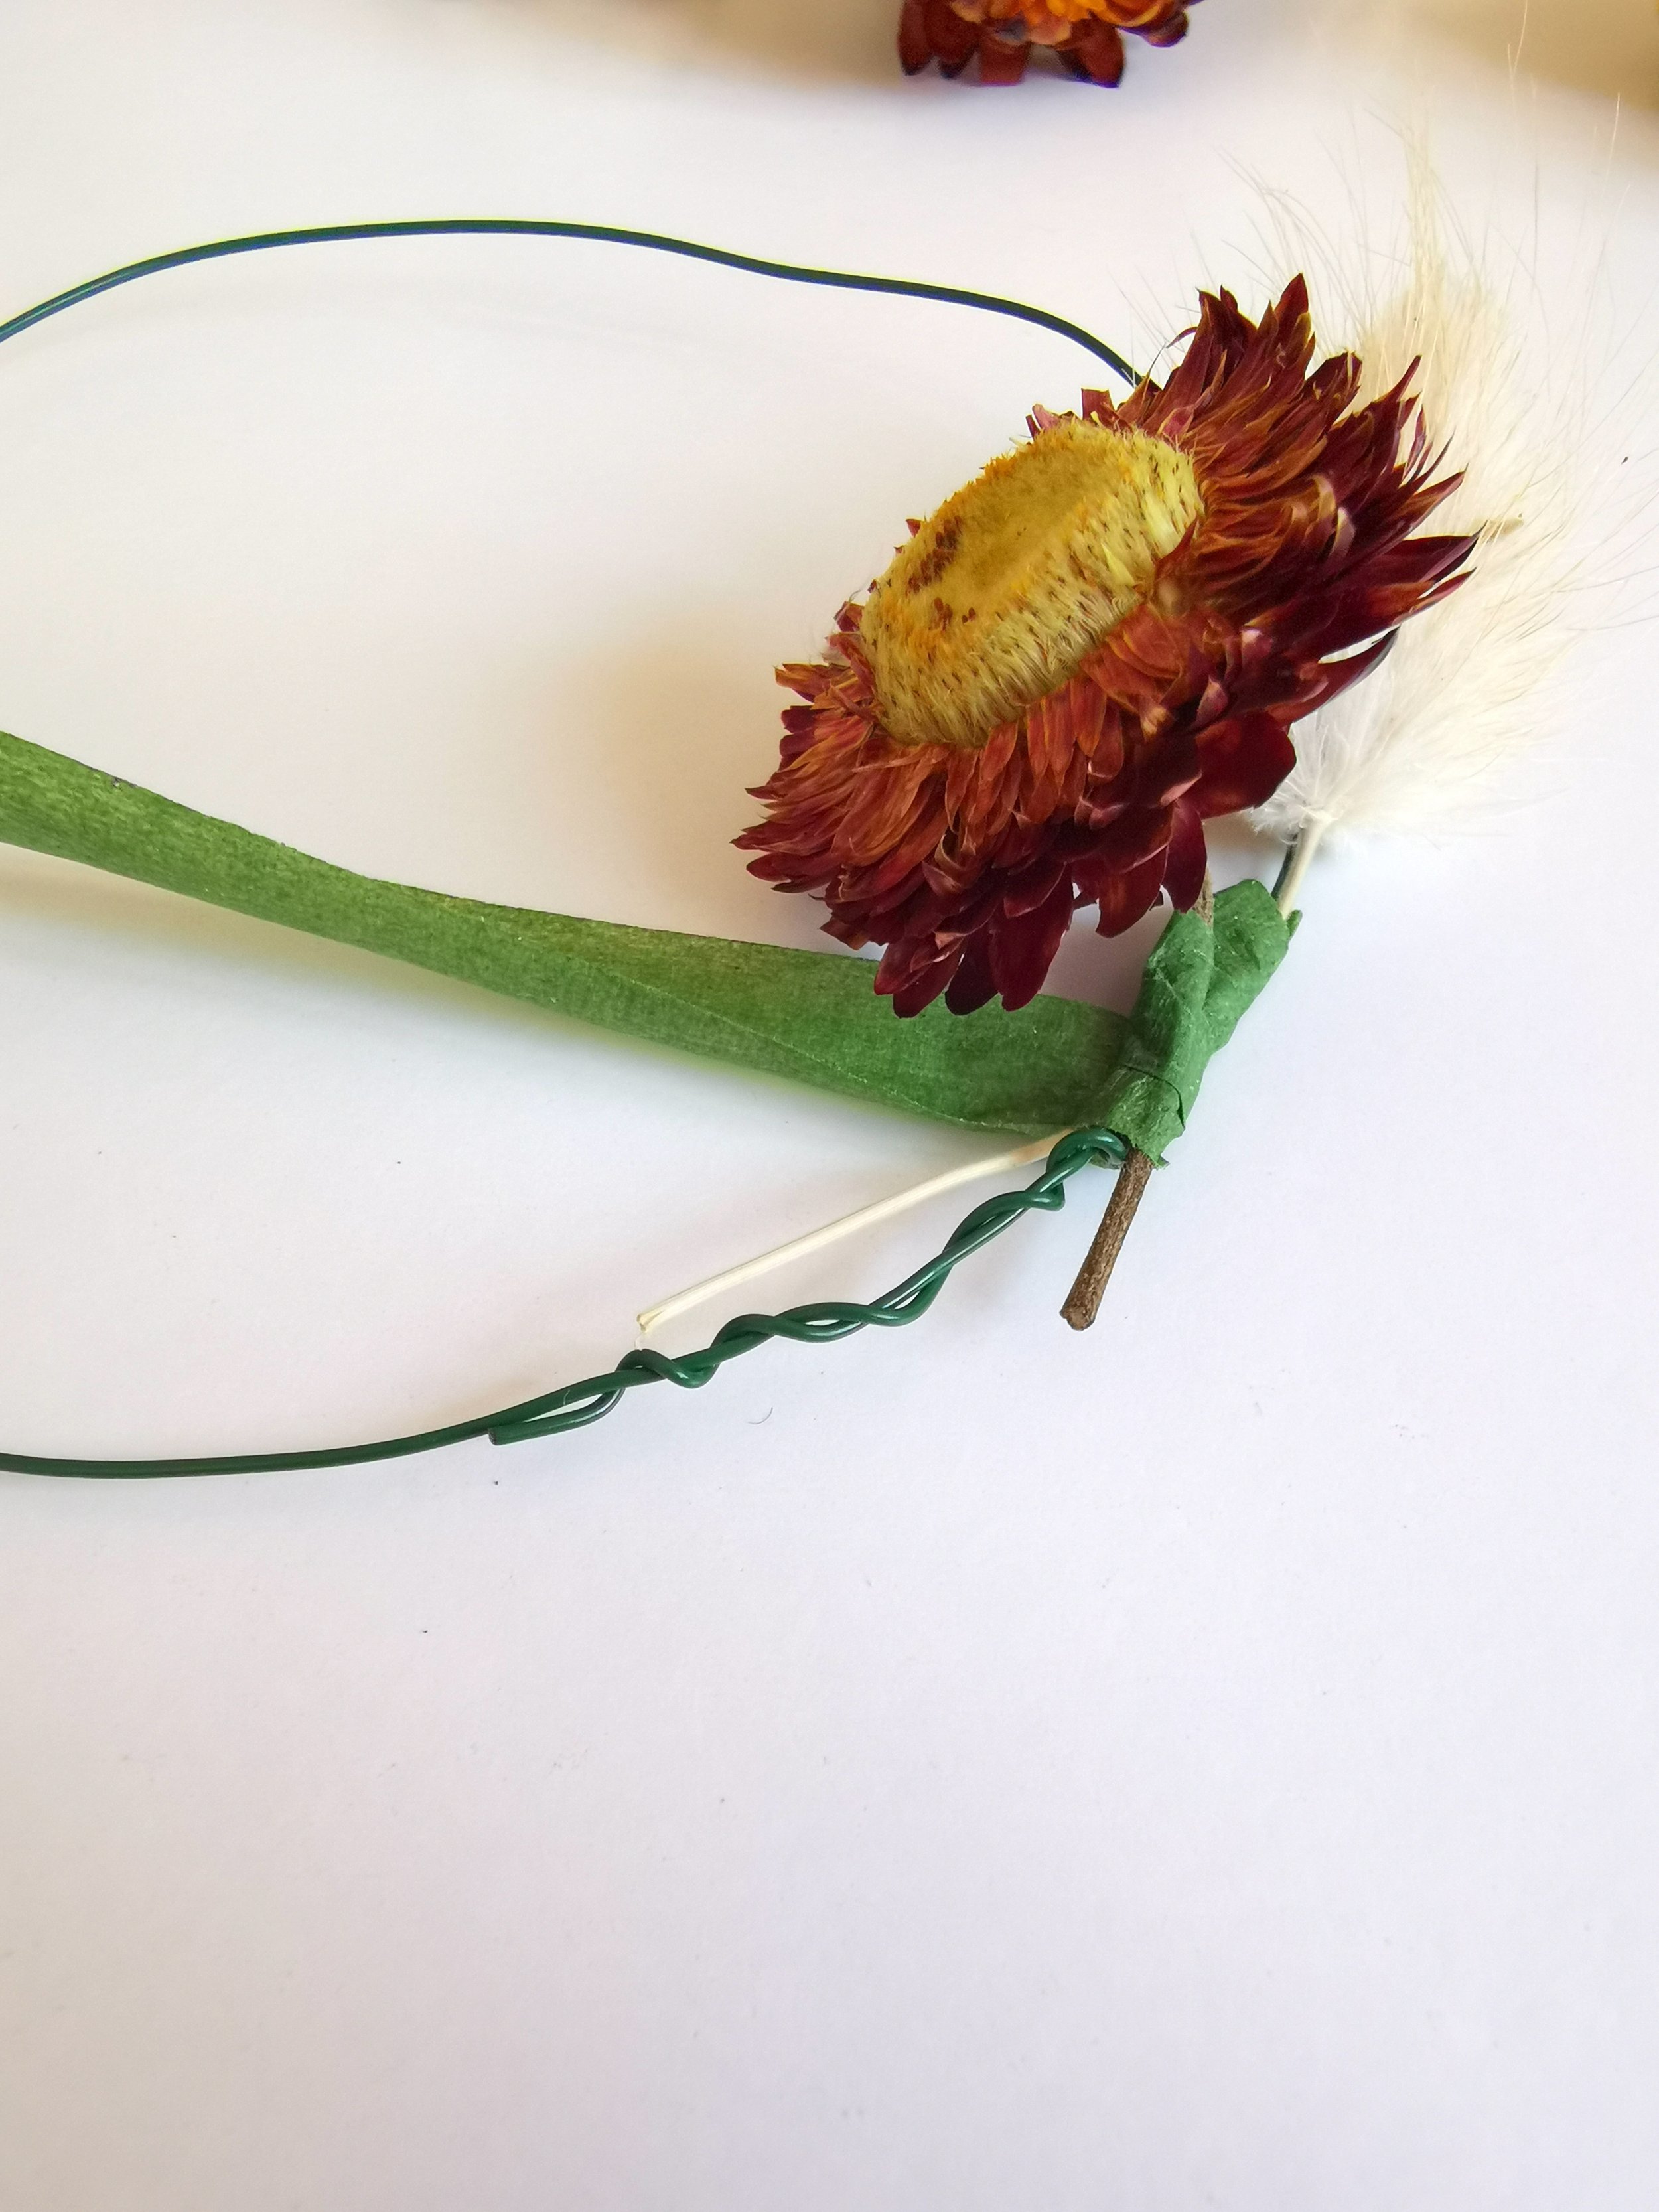
Step 4. Add you second flower or grass slightly further down and round the hoop. Tape this on securely. If your tape rips when you’re working with it, just reattach it on where it came off and carry on adding your flowers.
Step 5. Add all your other flowers and grasses on one at a time by taping each one on slightly further round the hoop than the last. Spread the colours and textures through the design to create a more natural look.
Step 6. When all your flowers and grasses are added, loop through your ribbon where you'd like the top of your hoop to be and hang up your design.
You’re all finished! Now you can enjoy your hard work and the beautiful hoop you’ve made.
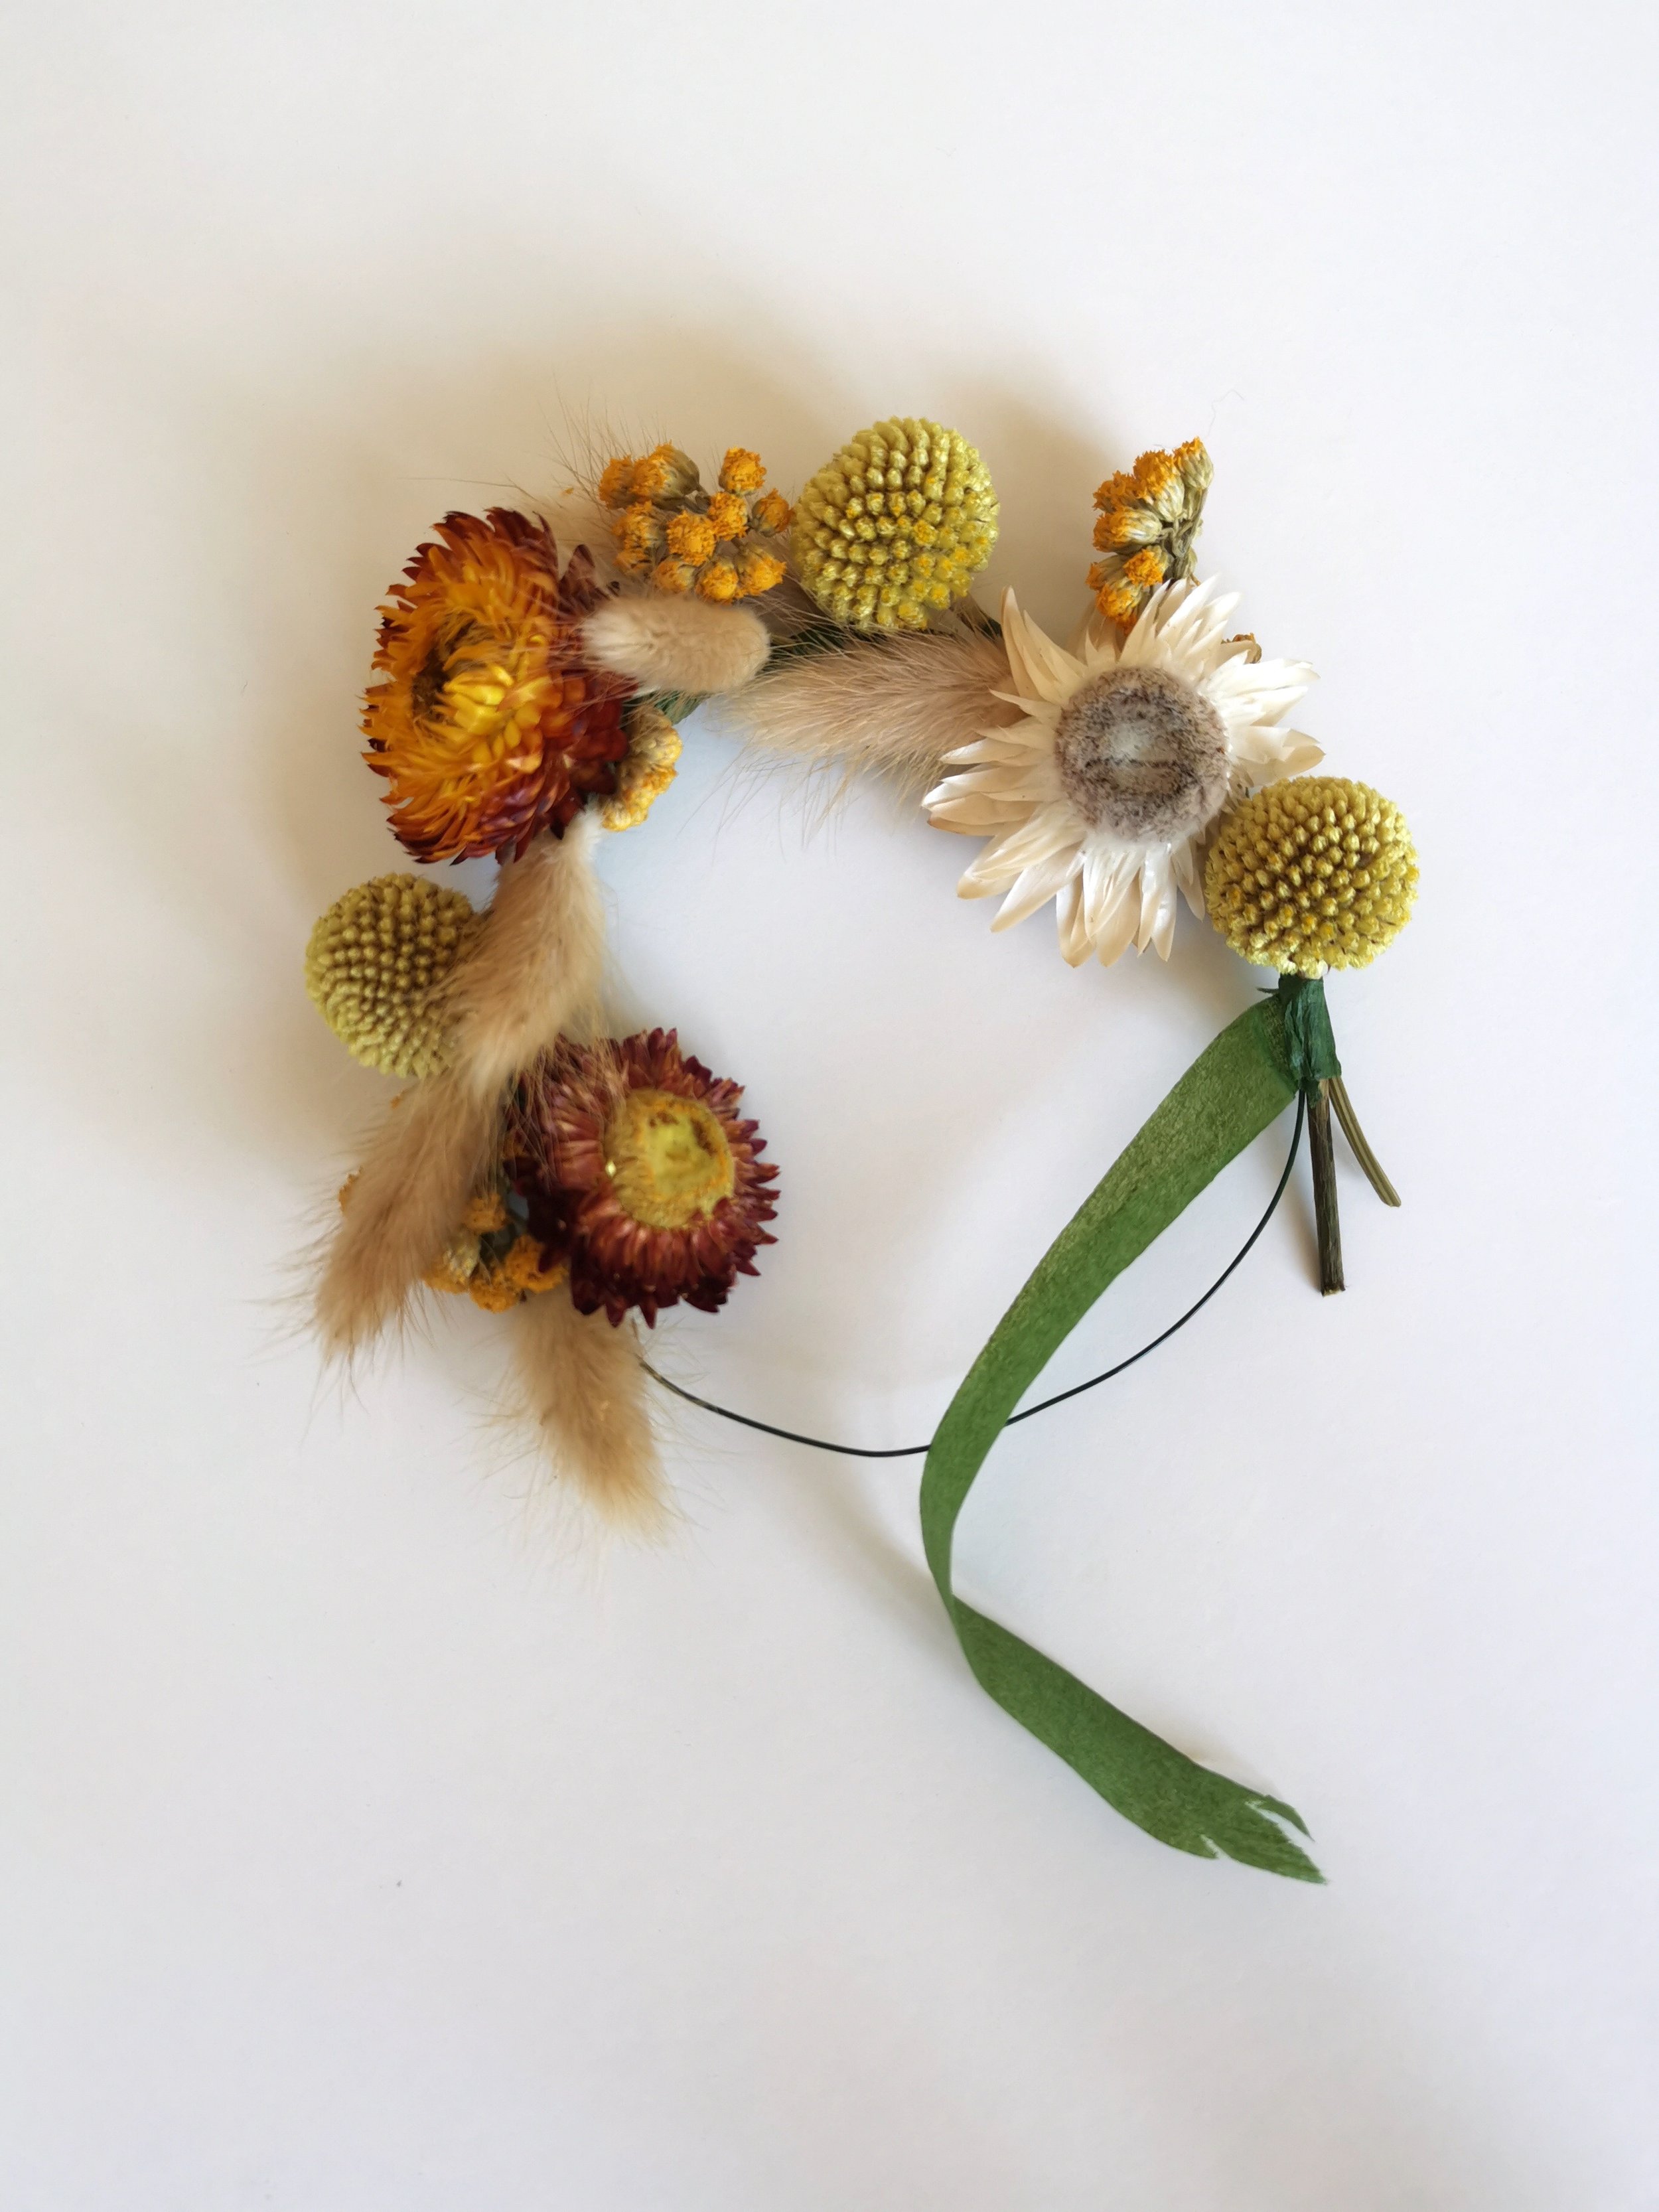
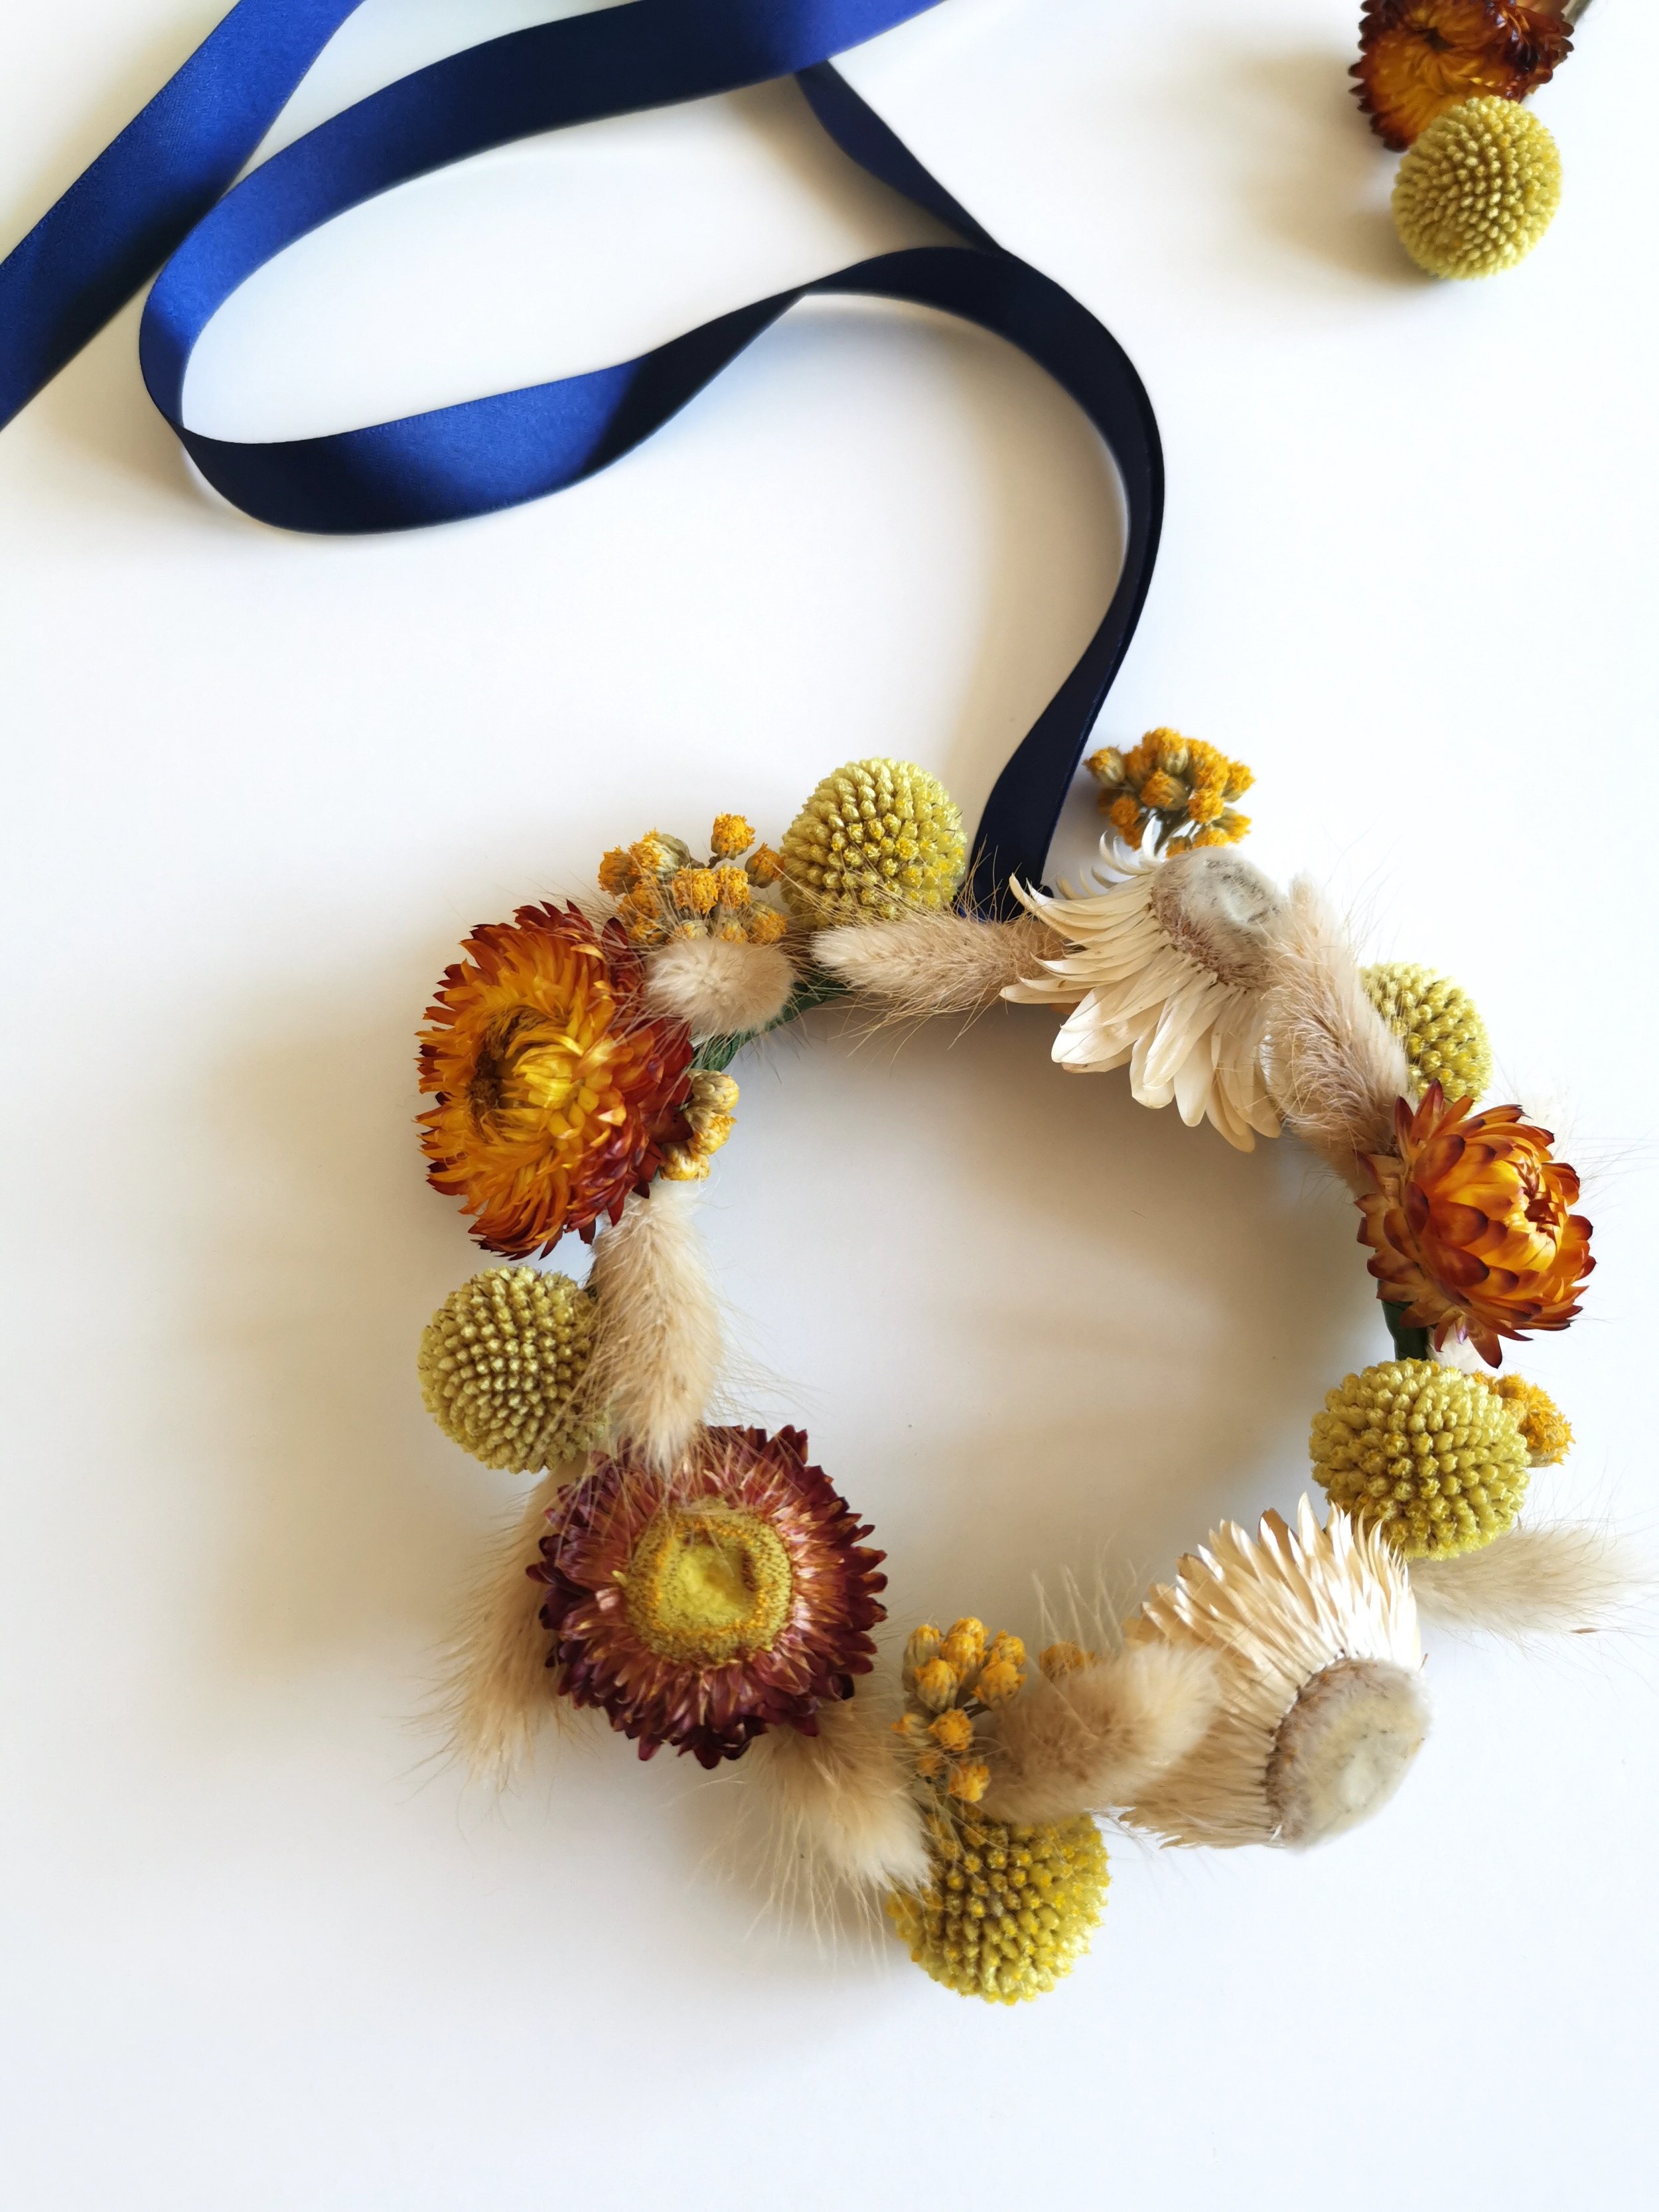
When you're choosing a colour palette for your wall hoop, it makes life easier to keep it simple and stick to 4 colours. For the hoop I chose burgundy, mustard yellow, orange and a neutral fawn shade.
I also used a variety of different shaped and textured flowers so not only are there some contrasting colour tones, there are also various textures that create interest in the hoop design too.
For your hoop, you could choose 1 dark shade, 2 medium shades and then a paler colour to add some depth and softness all at once.
I would love to see your mini dried floral hoop designs so tag me in the photos on Instagram @WebbandFarrer when you post your creations.
I send emails with lots more DIY flower tutorials like this one. Sign up just below to receive yours.