
how to arrange flowers in a dome shape - in 3 steps
I've been inspired by Sort Your Life Out on the BBC and over the past few weeks have been organising each room at home.
When I got to the kitchen sort through, I found a glass storage pot I wasn't using and decided it would be ideal for a dome shaped flower arrangement. So I've made a simple step by step to show you how to make a dome shape of flowers in this type of short and squat vase.
This style of flower arrangement is a simple way to create a luxurious impact with your shop or market bought flowers. Stack your magazines and books alongside this vase for relaxed weekend styling on the coffee table. For an even more boujee effect you could make 3 of these dome shaped arrangements of flowers and place them down a long table for a dinner party with beautiful napkins and candlesticks.
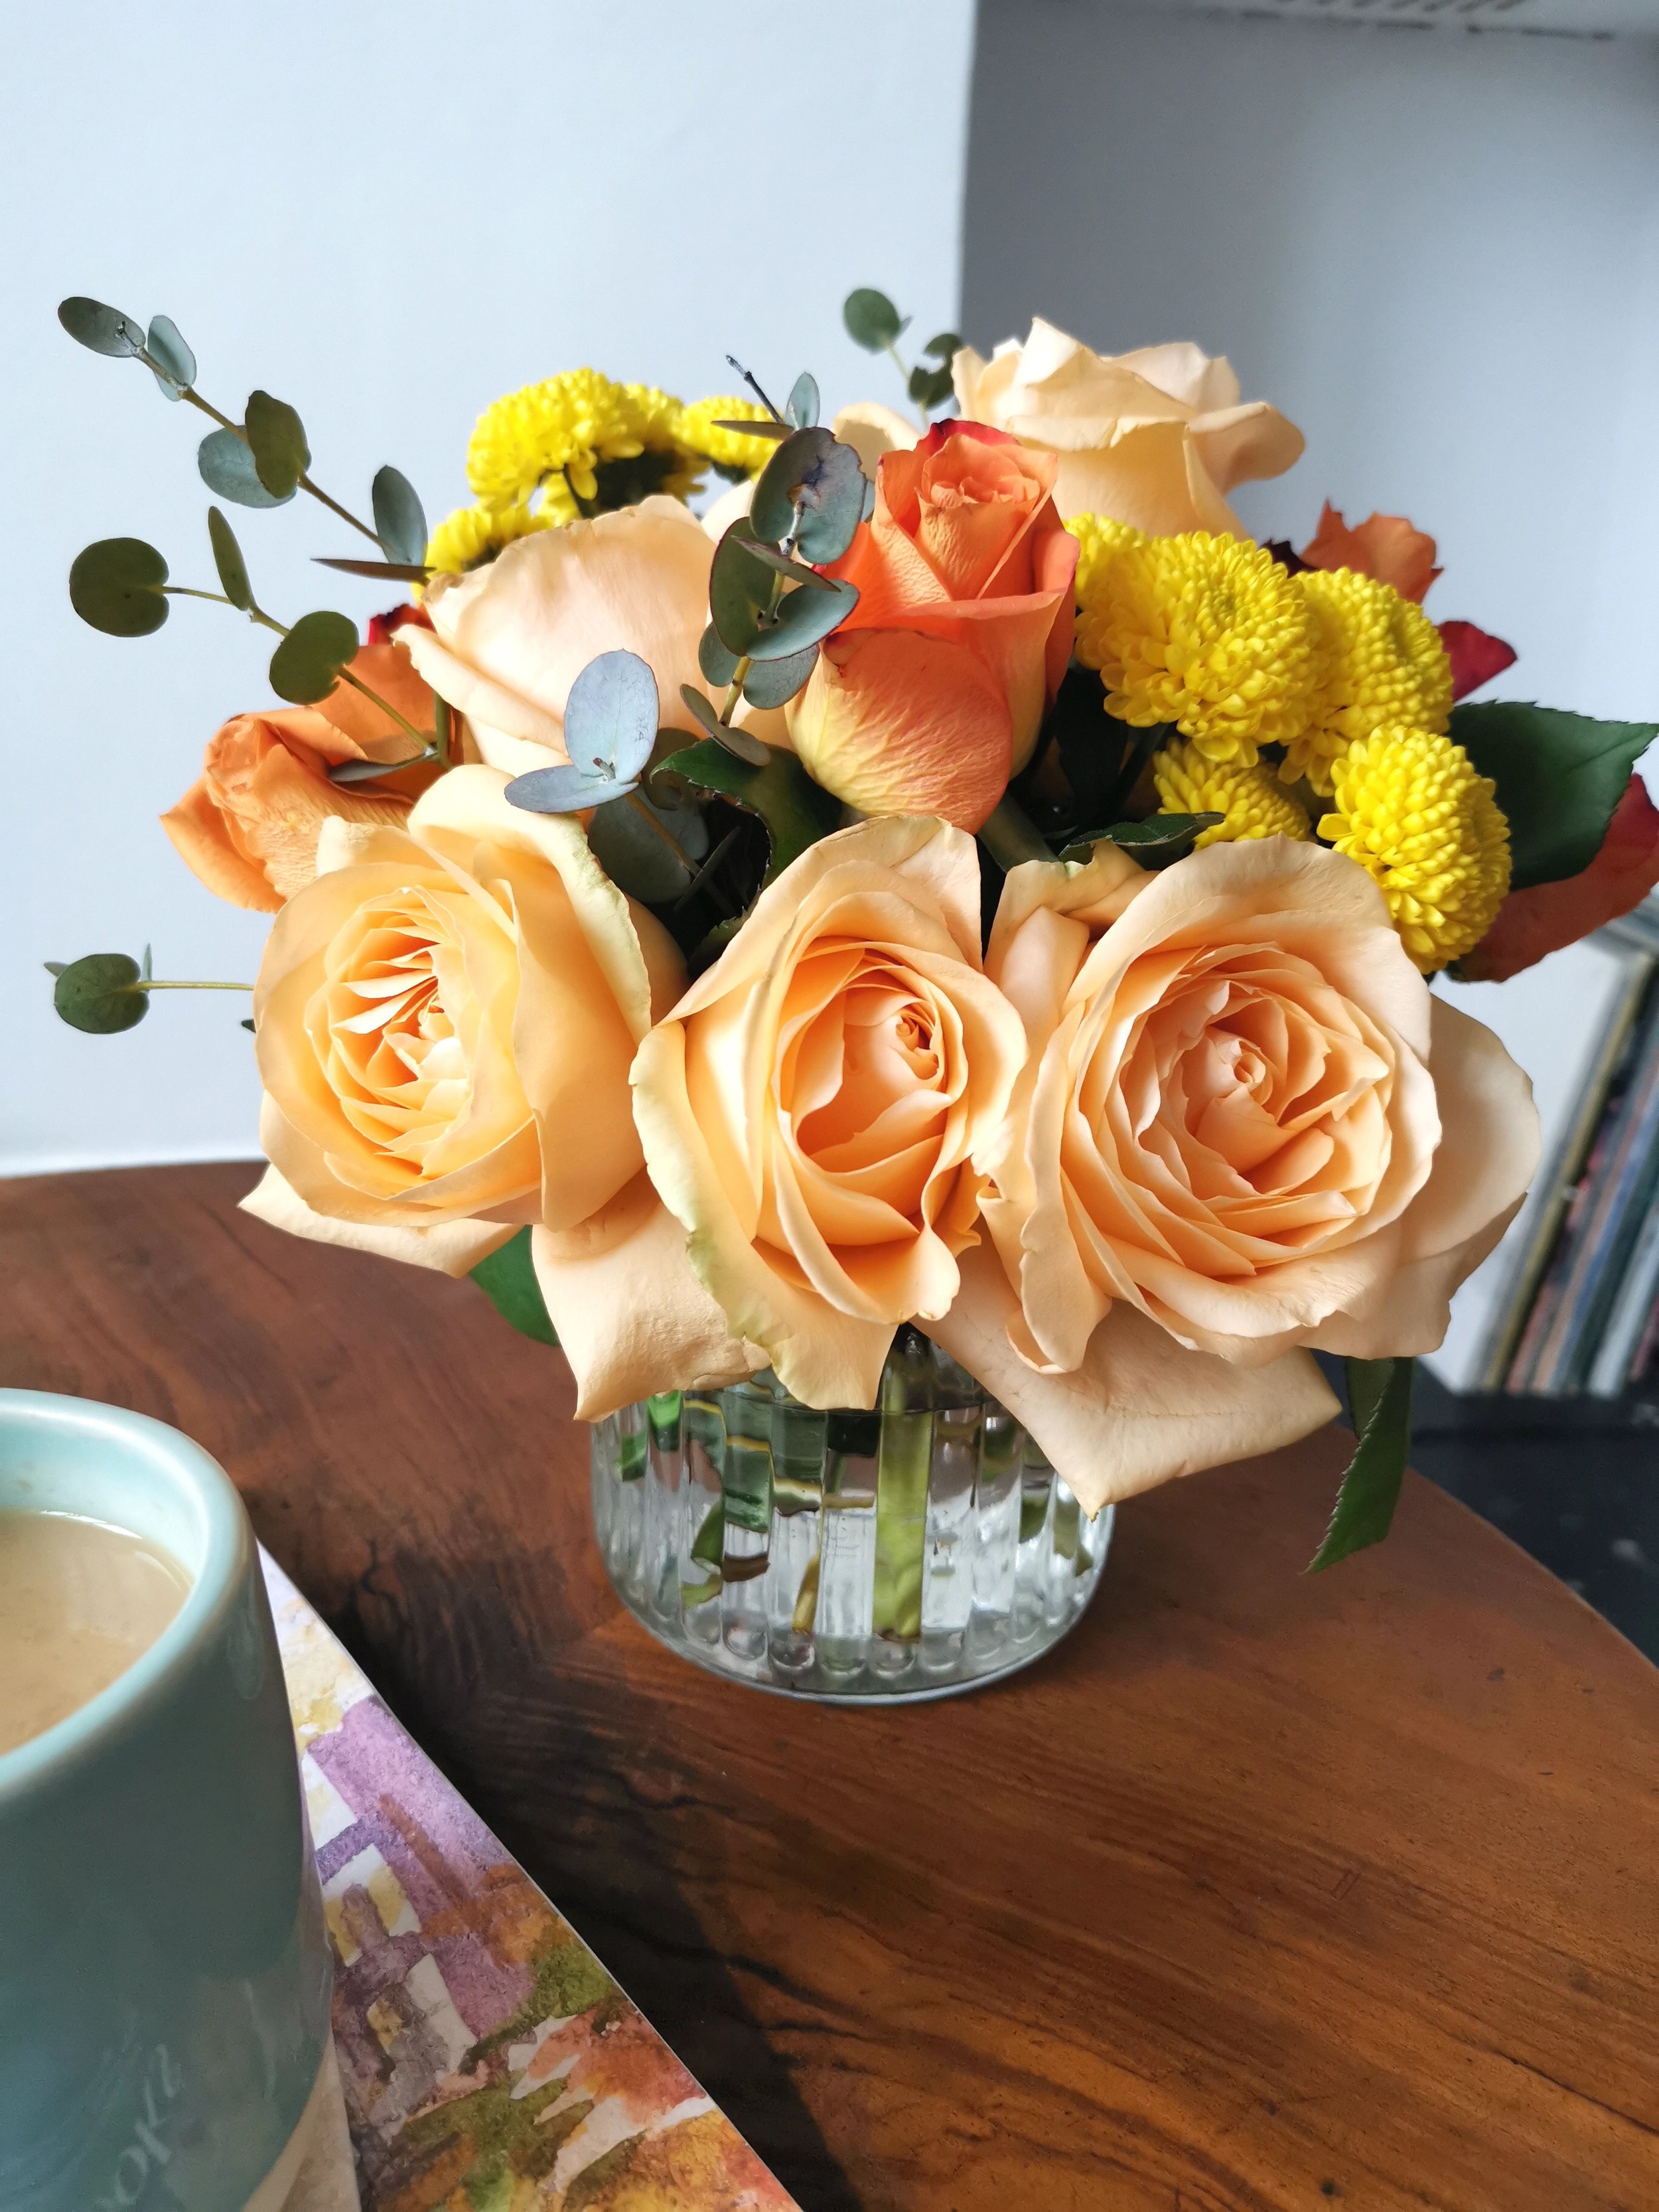
a dome of flowers, perfect on the coffee table at the weekend, add croissants and coffee for extra relaxation

To make your dome shaped flower arrangement you will need:
- a squat vase
- small amount of foliage
- round shaped flowers of your choice (I used about 12 stems in total including roses and santini)
- Scissors

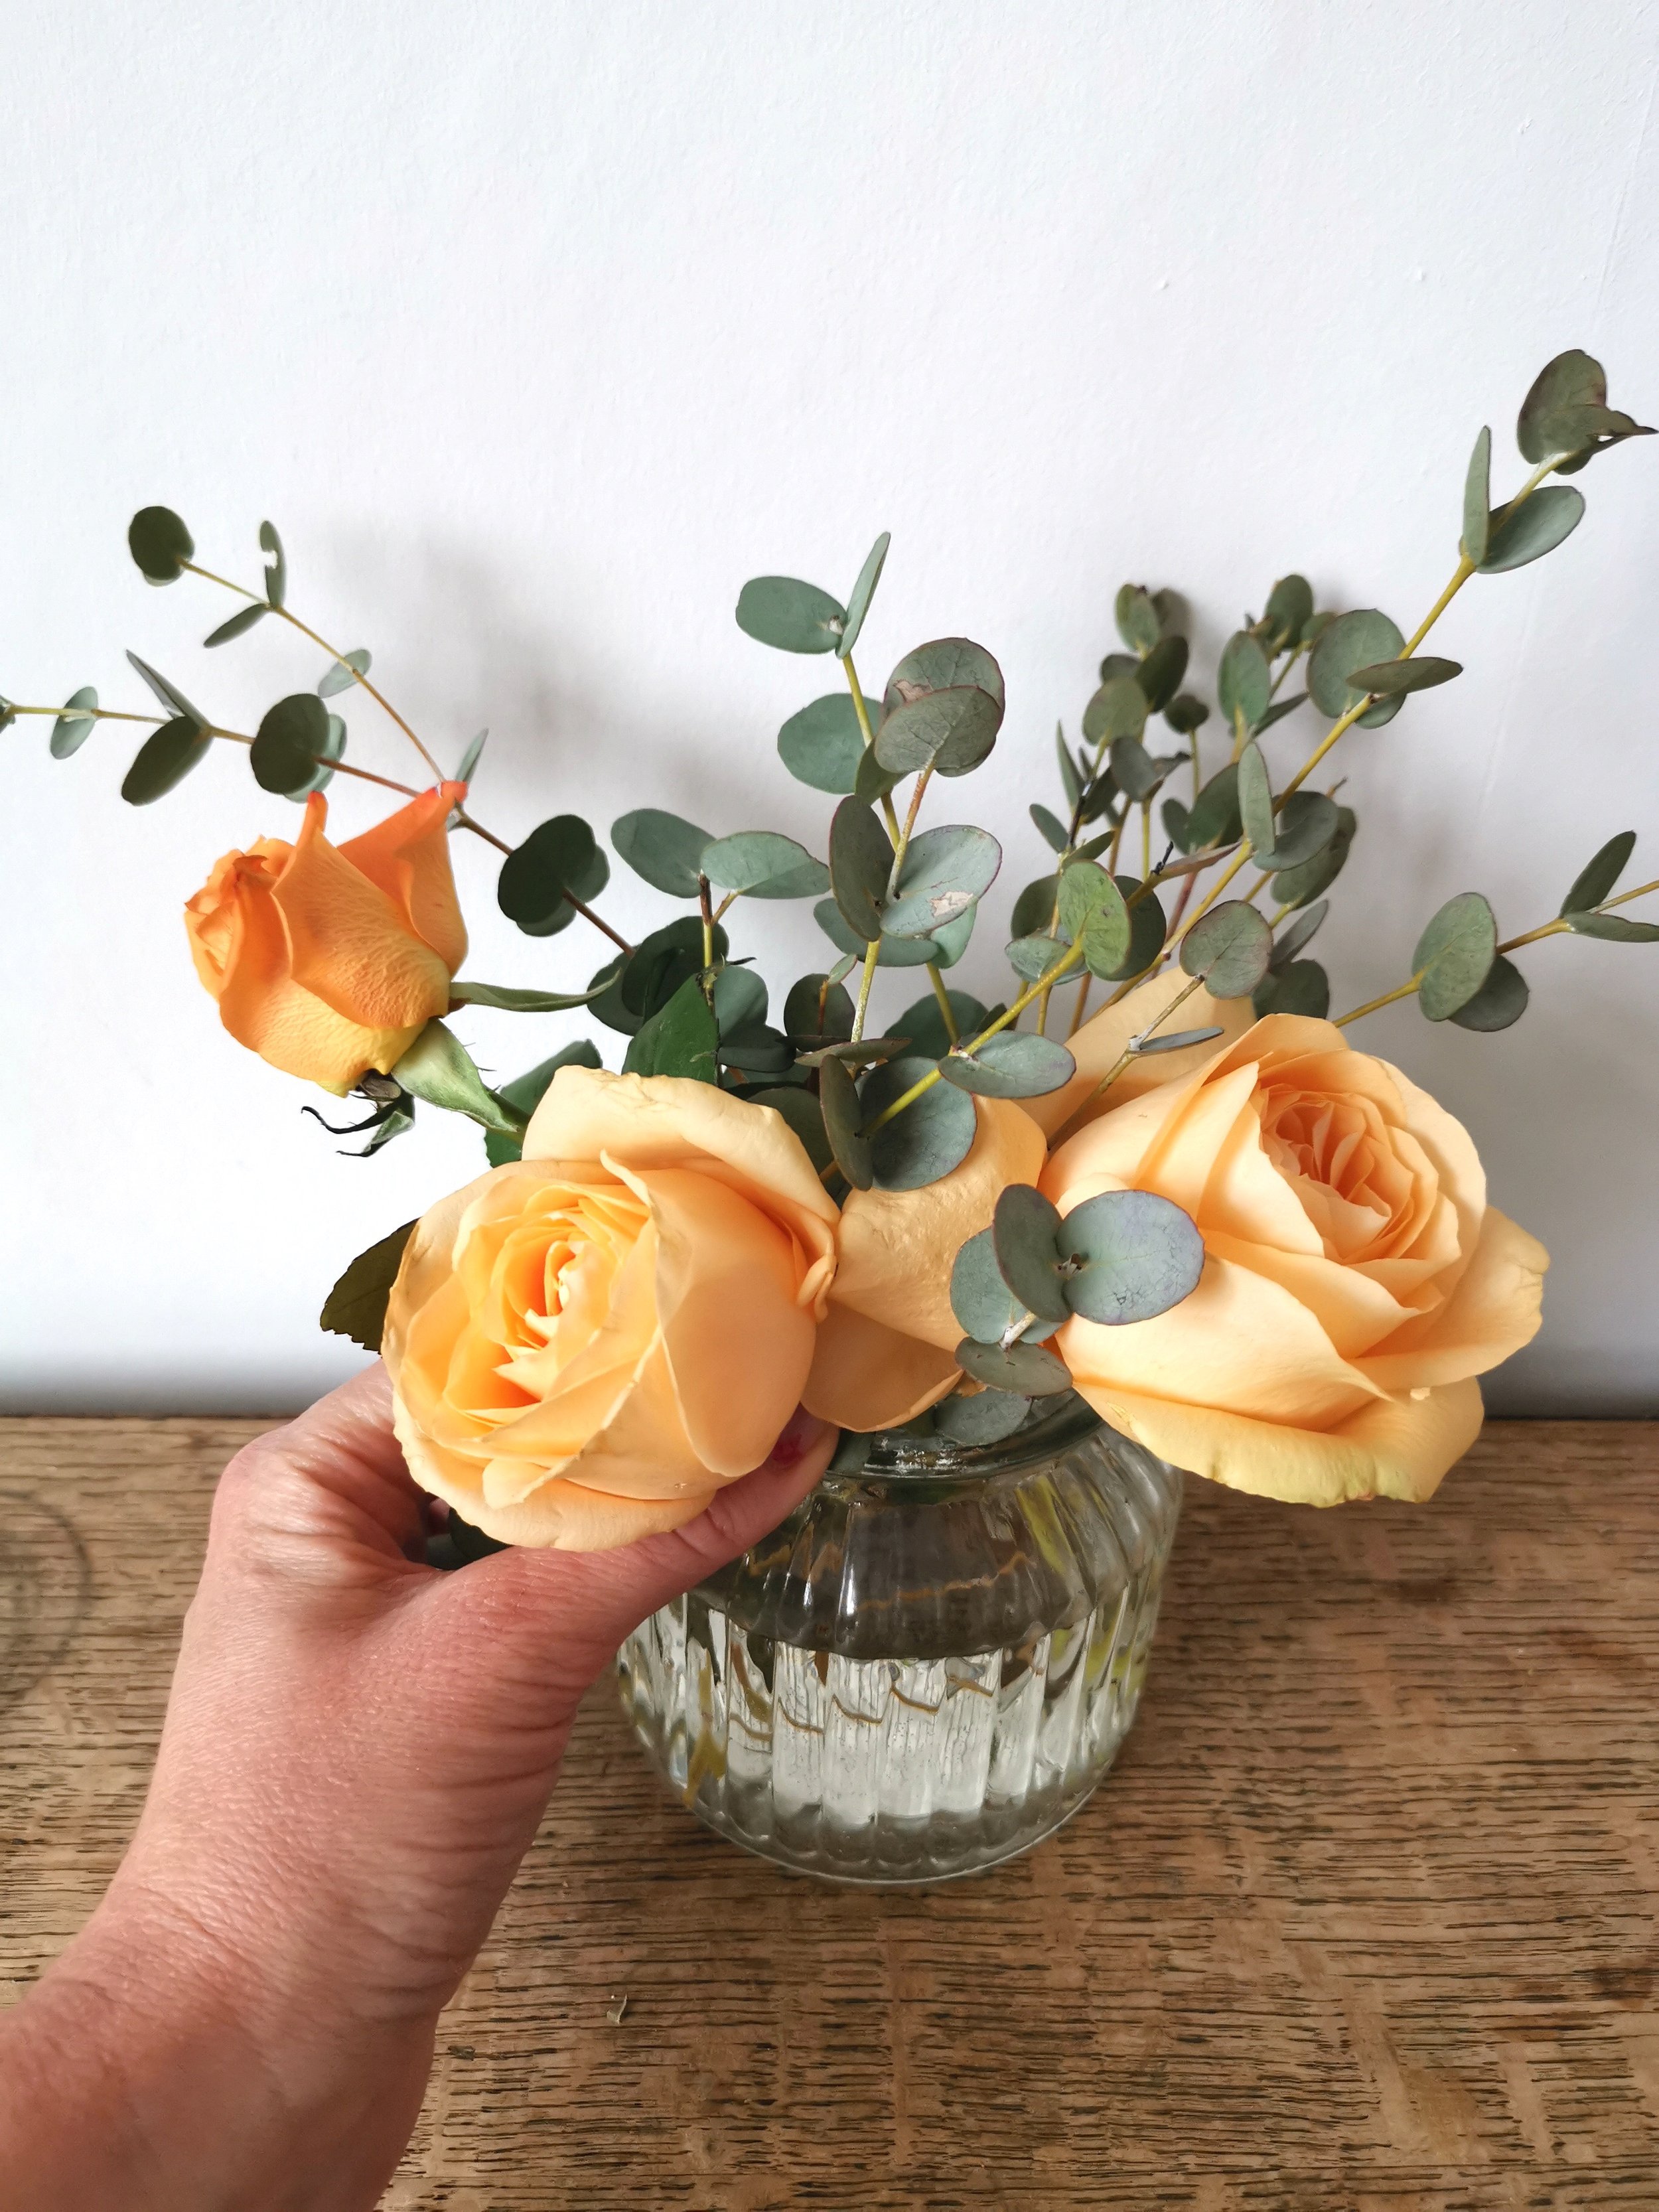
1. FILL WITH SHORT FOLIAGE
Put fresh cold water in your vase about halfway to 2/3 full. Place short stems of foliage into the vase so the stems criss-cross each other in the water. Make sure no leaves go below the water line. This step of the flower arranging process is useful because it creates a network for the flower stems to be supported in. I used very round leafed eucalyptus for this but you could use fresh herbs, ruscus, ferns or other foliage in season.
2. FLOWERS ROUND THE NECK OF THE VASE
Place about half of your flowers around the inside edge of the vase. Keep these flowers short, low and very close to the neck of the vase. Make sure the stems are cut at an angle to increase the surface area for the water to flow up. If these flower stems have leaves on them, make sure none of the leaves go under the water line because they will discolour the water quickly.

3. PLACE FLOWERS IN THE CENTRE
As this is a round dome shaped design, there needs to be another level to the flowers to create that curve. To make the curved dome shape, the flowers going in the central gap need to be a little bit taller than the flowers that have just gone round the neck of the vase. If in doubt about the length the stems need to be, measure each stem up against the vase before you cut it.
Carry on filling the central gap in the dome with the rest of your flowers. Wiggle things round and adjust them until you're happy with your round dome shape.
Now you can place the dome arrangement on your table and admire your creativity. This short arrangement is handy for a table of drinks and nibbles, with guests coming over it’s not too tall to be knocked over when someone reaches for their glass of bubbles but it’s still an elegant way to decorate the table with flowers.
To keep the flowers lasting longer, so you can enjoy them for lots more days, change the water every couple of days and recut the stems. Recutting the stems gives the flowers a mini re-boost and helps the water travel up to the petals. Any petals, leaves or cut stems that you’ve discarded can go in the compost.
I would love to see your flower arrangements, tag me on Instagram @WebbandFarrer it brings me lots of joy!

Want to make your own bouquet and wedding flowers?
Discover how to create wedding flowers your guests will be wowed at and you can look back on through your wedding photos long after the wedding day.